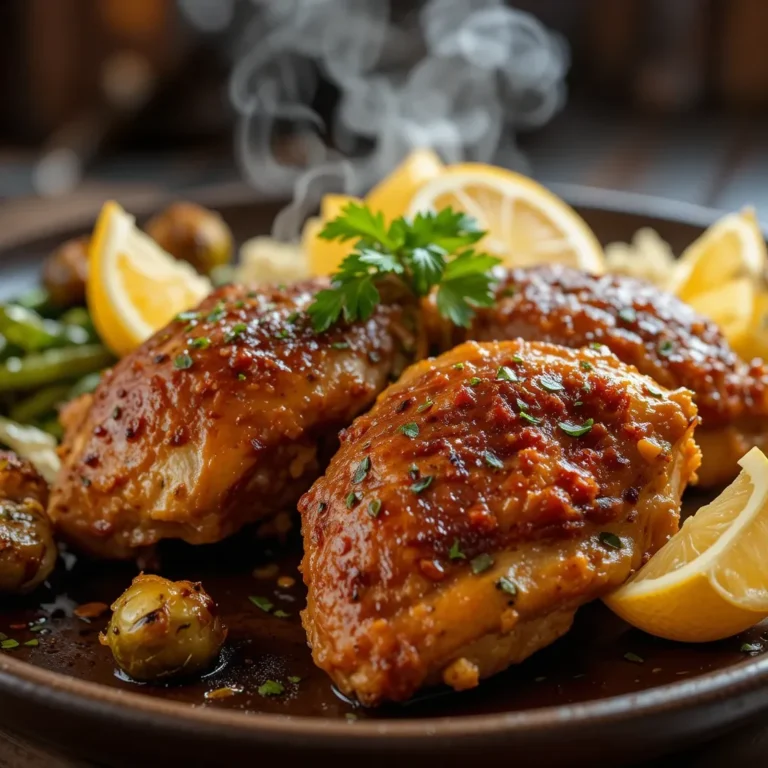
10 Cold Lunch Ideas for Kids at School Ideas
Picture this: It’s Sunday evening, and you’re staring at your empty lunch containers wondering what magic you can create for the week ahead. School mornings are chaotic enough without the added stress of packing lunches! These 10 cold lunch ideas for kids at school are absolute lifesavers that keep my kids excited about lunchtime.
No heating required, no soggy sandwiches, just delicious meals that taste amazing at room temperature. These recipes are simple, budget-friendly, and have been tested by my toughest critics—my three picky eaters! Similar to my popular “Easy Snack Boxes for Kids” post, these ideas focus on variety and nutrition without complicated prep work.
What Are Cold Lunch Ideas for Kids at School?
Ever wonder why cold lunches have become the go-to choice for busy parents everywhere? Cold lunch ideas are simply meals that taste delicious without reheating and stay fresh in a lunchbox until midday. They’re the answer to every parent’s prayer when schools don’t have microwaves or your child barely has time to eat!
Think colorful bento boxes, creative wraps, and fun combinations that make kids actually want to open their lunch bags. As they say, the way to a child’s heart is through their stomach—and these cold lunches prove it every single day. Ready to transform your lunch-packing routine? Let’s dive in!
Why You’ll Love These Cold Lunch Ideas for Kids at School
Time-Saving Magic: The biggest win? Most of these lunches can be prepped the night before or even batch-prepared on weekends. I typically spend 30 minutes on Sunday afternoon assembling components, and my weekday mornings become stress-free. No more rushing around while your coffee gets cold!
Budget-Friendly Options: Making lunches at home saves serious money compared to school cafeteria meals or pre-packaged options. I’ve calculated that these homemade cold lunches cost about $2-3 per child, while school lunches run $5-7. That’s potential savings of $60-100 per month per child! Plus, you control the ingredients and portions.
Nutritious and Delicious: Each idea incorporates proteins, whole grains, fruits, and vegetables in ways kids actually enjoy. The colorful presentation and variety keep taste buds interested while ensuring balanced nutrition. Just like my “Healthy After-School Snacks” collection, these lunches sneak in nutrients without the battle. Your kids get sustained energy for learning while you get peace of mind knowing they’re well-fed.
Ready to say goodbye to the “what’s for lunch?” panic? Let’s explore these creative options that will make you the cool lunch parent!
How to Make These Cold Lunch Ideas
Quick Overview
These cold lunch ideas are designed for real life—busy parents, picky eaters, and tight budgets. Each option can be customized based on your child’s preferences and any dietary restrictions. The beauty of cold lunches is their flexibility and simplicity.
Total Prep Time: 5-15 minutes per lunch Assembly Time: 2-5 minutes for most options Shelf Life: Best consumed within 4-5 hours of packing
1. Turkey and Cheese Pinwheels
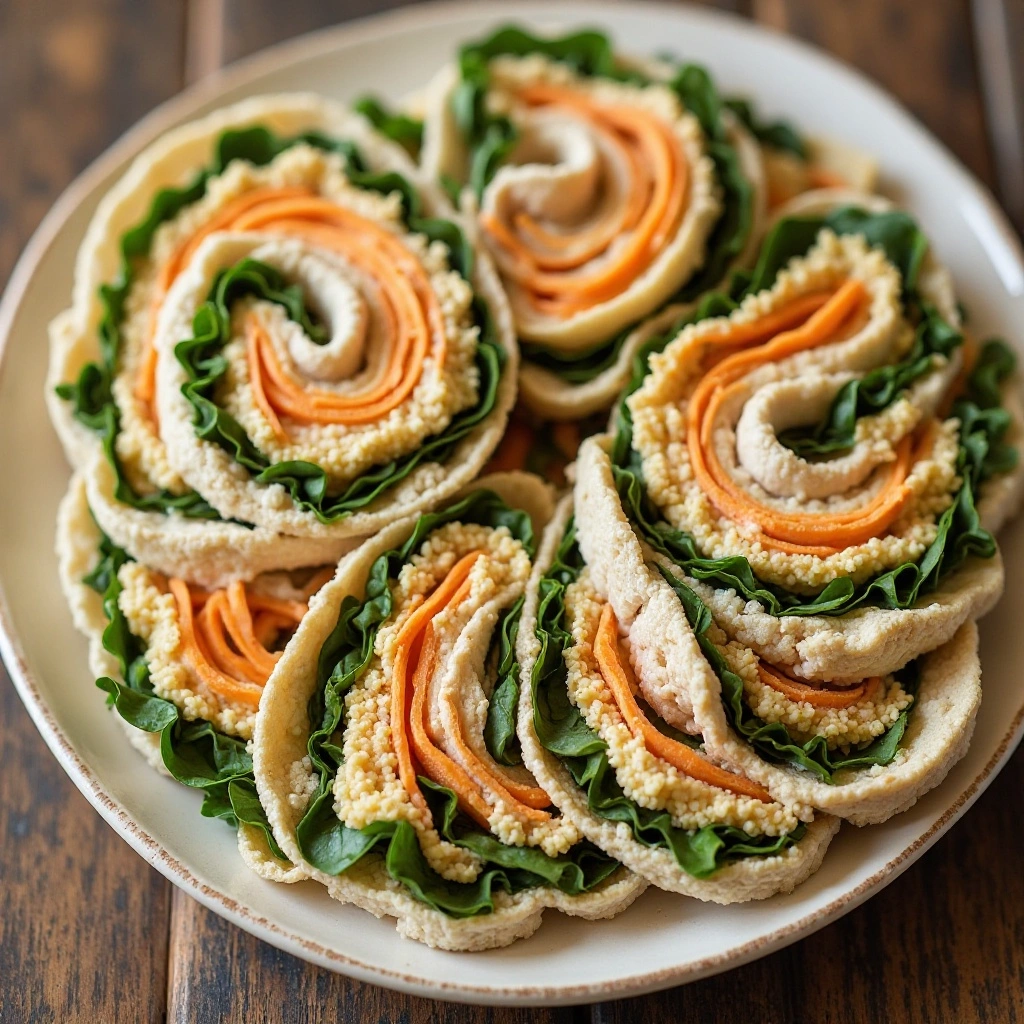
Why This Works
Kids love food that looks fun, and these colorful spirals are Instagram-worthy! The pinwheel shape makes them easy to eat and portion-controlled.
Ingredients
- 4 large flour tortillas (whole wheat or regular)
- 8 slices deli turkey breast
- 4 slices cheddar or mozzarella cheese
- 4 tablespoons cream cheese, softened
- 1 cup fresh spinach leaves
- 4 tablespoons shredded carrots
- Optional: thin cucumber slices
Step-by-Step Instructions
Lay one tortilla flat on a clean cutting board or work surface. Make sure it’s at room temperature so it doesn’t crack when rolling.
Spread one tablespoon of cream cheese evenly across the entire tortilla, leaving about half an inch around the edges. The cream cheese acts as glue and adds creaminess.
Layer two slices of turkey meat across the tortilla, slightly overlapping them. Add one slice of cheese on top of the turkey.
Arrange a handful of spinach leaves across the center of the tortilla. Sprinkle one tablespoon of shredded carrots over the spinach. Add cucumber slices if using.
Starting from one edge, tightly roll the tortilla into a log shape. The tighter you roll, the better they’ll hold together. Press gently as you roll to seal everything inside.
Using a sharp knife, slice the roll into 1-inch thick pinwheels. You should get about 6-8 pinwheels per tortilla.
Pack in an airtight container with a small ice pack to keep fresh.
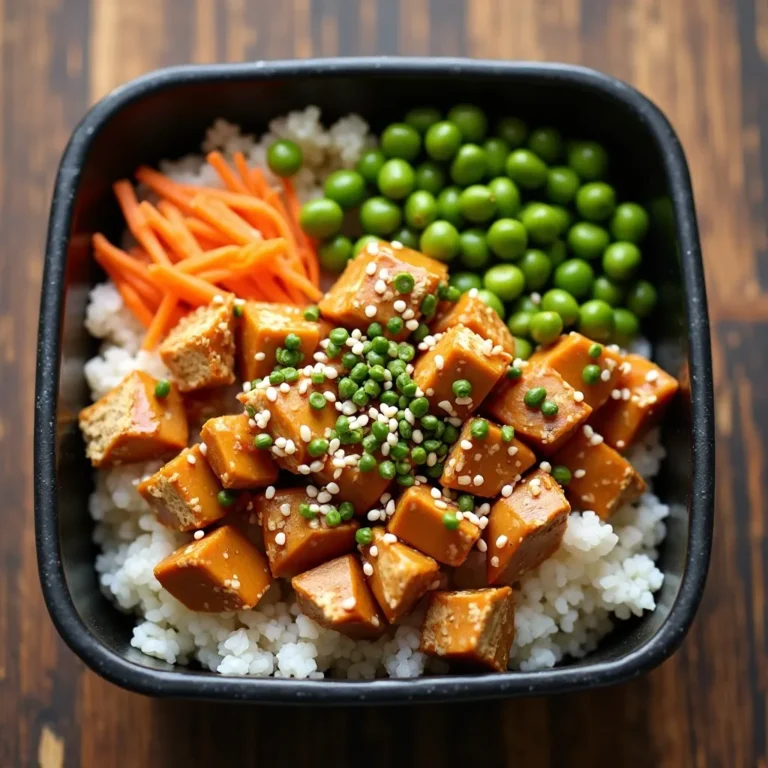
2. DIY Lunchables-Style Bento Box
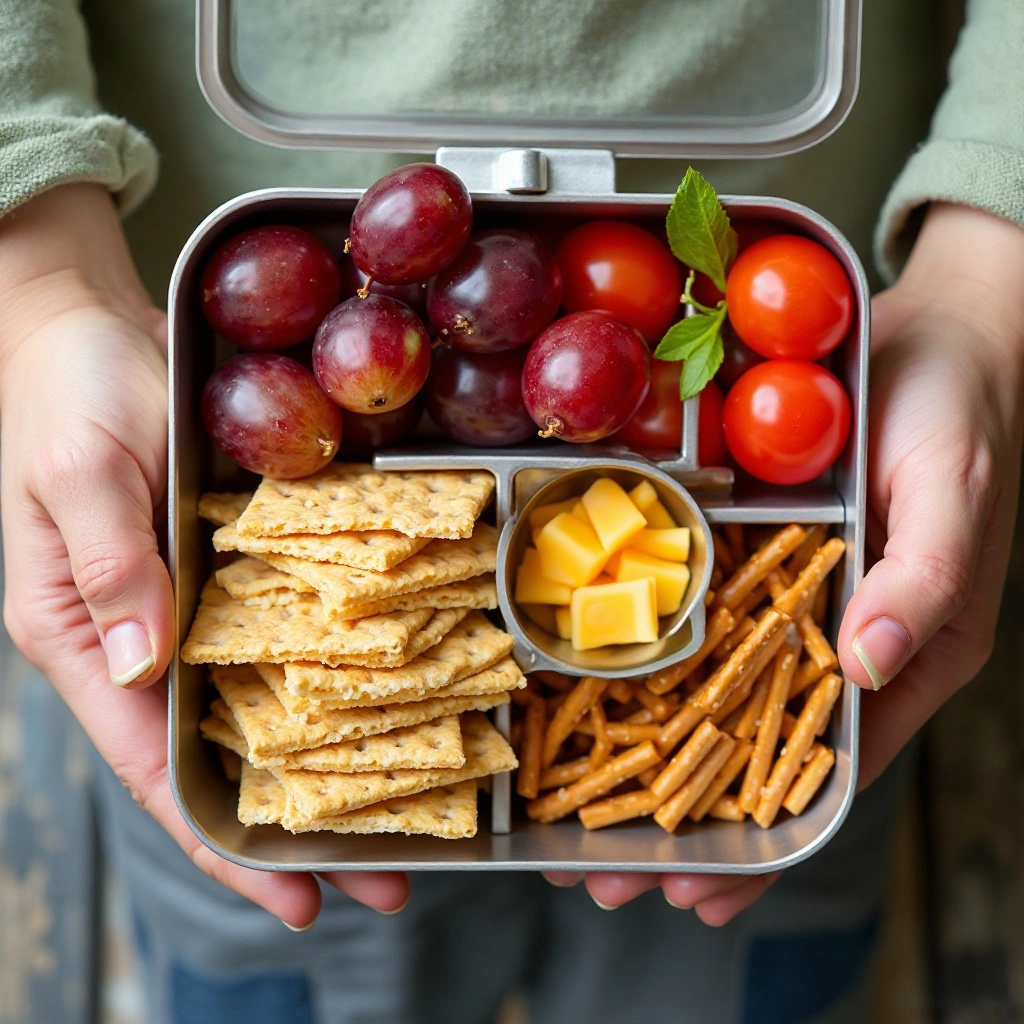
Why This Works
This gives kids the fun of building their own lunch while you control the ingredients and quality. It’s interactive and eliminates the “I don’t like that” complaints!
Ingredients
- 15-20 whole grain crackers
- 8 cubes cheddar or colby jack cheese (½-inch cubes)
- 1 cup grapes, washed
- 10 cherry tomatoes
- 4-5 pretzel sticks
- 2 tablespoons hummus or ranch dip (in small container)
Step-by-Step Instructions
Choose a divided lunch container or bento box with at least 4-5 compartments. This keeps everything organized and prevents mixing.
In the largest compartment, arrange the crackers in a neat stack or fan pattern. This is the base of their “assembly station.”
Place the cheese cubes in their own compartment. The bite-sized pieces are perfect for little hands and stack perfectly on crackers.
Fill one section with grapes and another with cherry tomatoes. The variety of colors makes the lunch visually appealing.
Add pretzel sticks to a small section for crunch variety. Include the hummus or ranch in a separate tiny container with a tight lid to prevent spills.
Close the lid securely and pack with an ice pack to maintain freshness.
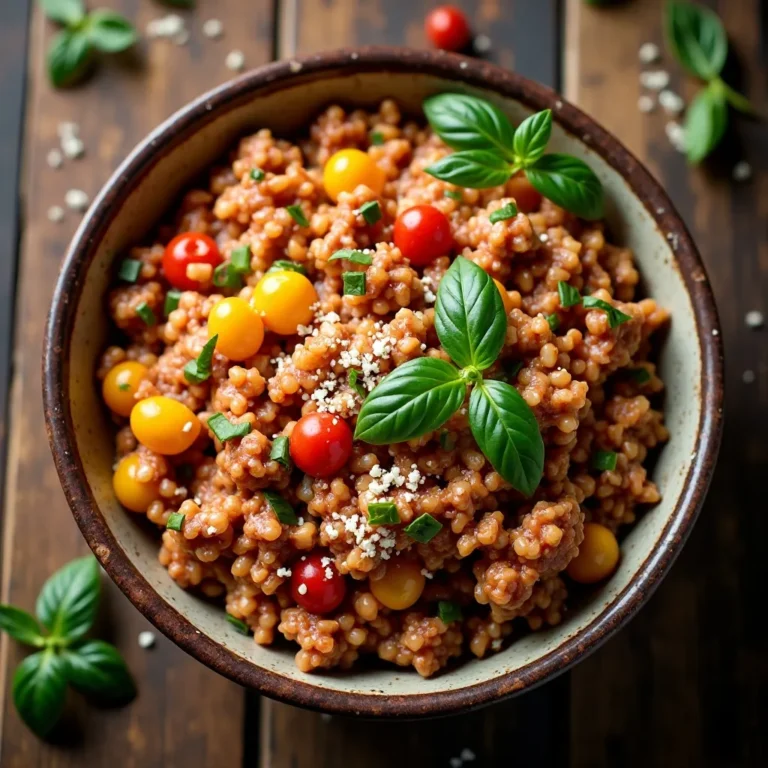
3. Veggie-Packed Pasta Salad
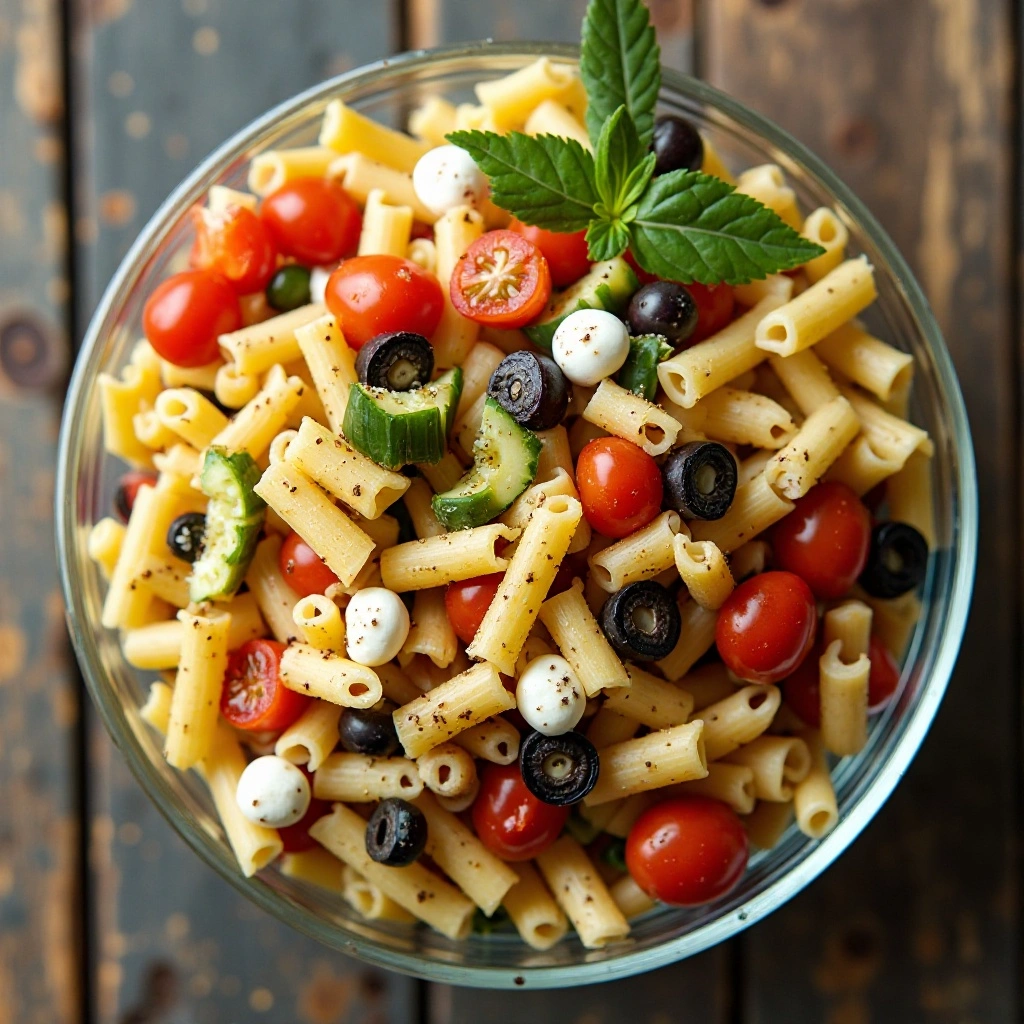
Why This Works
Pasta salad is filling, customizable, and actually tastes better after sitting for a few hours as flavors meld together. It’s a complete meal in one container!
Ingredients
- 2 cups cooked pasta (rotini, penne, or bowtie)
- ½ cup cherry tomatoes, halved
- ½ cup cucumber, diced
- ½ cup bell peppers (any color), diced
- ¼ cup black olives, sliced
- ½ cup mozzarella cheese balls or cubes
- 3 tablespoons Italian dressing
- 1 teaspoon dried basil
- Salt and pepper to taste
Step-by-Step Instructions
Cook the pasta according to package directions until al dente. Drain and rinse under cold water to stop the cooking process and cool it down quickly.
Transfer the cooled pasta to a large mixing bowl. Drizzle one tablespoon of Italian dressing over it and toss to prevent sticking.
Add all the chopped vegetables to the bowl—cherry tomatoes, cucumber, bell peppers, and olives. The more colorful, the more appealing to kids!
Gently fold in the mozzarella cheese. Use a large spoon to combine everything evenly without mashing the ingredients.
Pour the remaining Italian dressing over the salad. Sprinkle with dried basil, salt, and pepper. Toss everything together until well coated.
Cover and refrigerate for at least one hour or overnight. This resting time allows the flavors to develop beautifully.
Pack in an airtight container with a fork. This stays fresh in a lunchbox for 4-5 hours.
4. Peanut Butter and Banana Sushi

Why This Works
This creative twist on a classic combination makes healthy eating fun! It’s naturally sweet, provides lasting energy, and looks so cool that kids can’t wait to show their friends.
Ingredients (Makes 1 serving)
- 1 large flour tortilla
- 2 tablespoons peanut butter (or sunflower seed butter for nut-free)
- 1 medium banana
- 2 tablespoons honey or maple syrup
- 2 tablespoons granola
- Optional: mini chocolate chips (1 tablespoon)
Step-by-Step Instructions
Place the tortilla on a flat surface. Spread peanut butter evenly across the entire tortilla, going all the way to the edges this time.
Drizzle honey or maple syrup over the peanut butter layer. This adds extra sweetness and helps the granola stick.
Sprinkle granola evenly across the tortilla. Press it gently into the peanut butter so it adheres well.
Place the whole banana at one edge of the tortilla, positioning it horizontally across the width.
Roll the tortilla tightly around the banana, keeping it as tight as possible. The peanut butter will seal the edges.
Using a sharp knife, slice the roll into 1-inch thick pieces that look like sushi rolls. You should get about 6-8 pieces.
Arrange the “sushi” pieces in a container. They look adorable standing on their ends! Pack with a small ice pack if including chocolate chips.
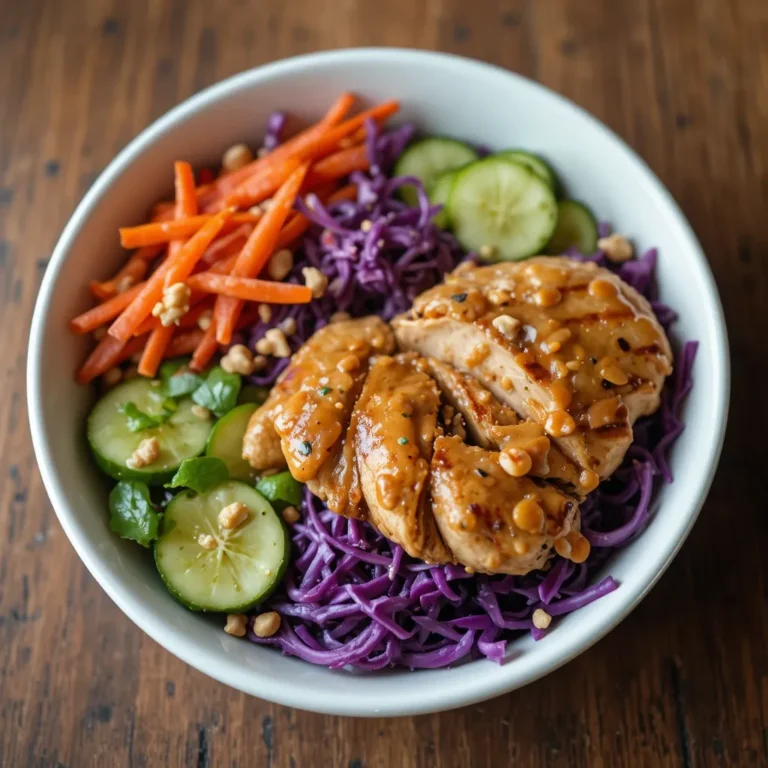
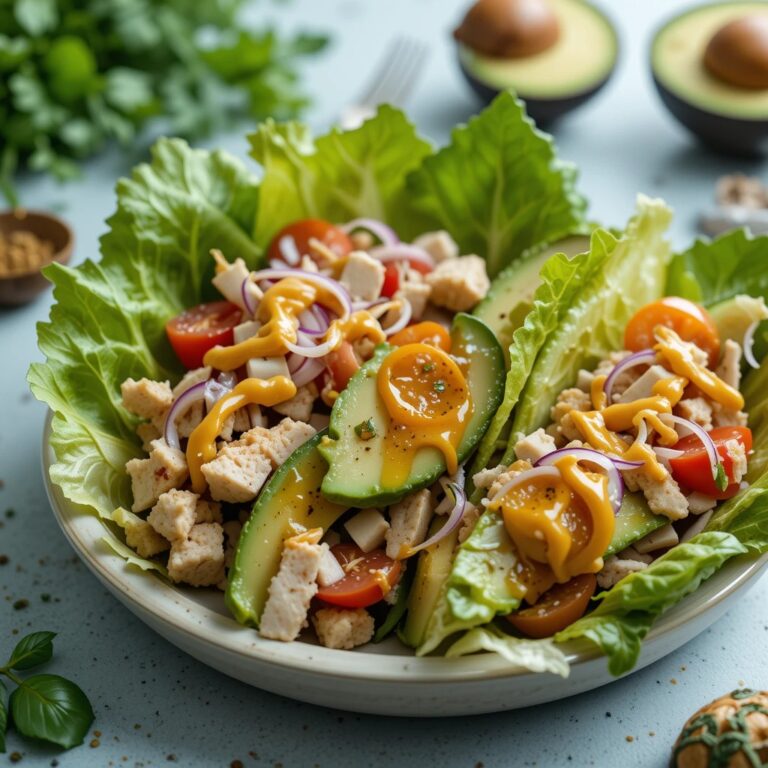
6. Chicken Salad Lettuce Wraps
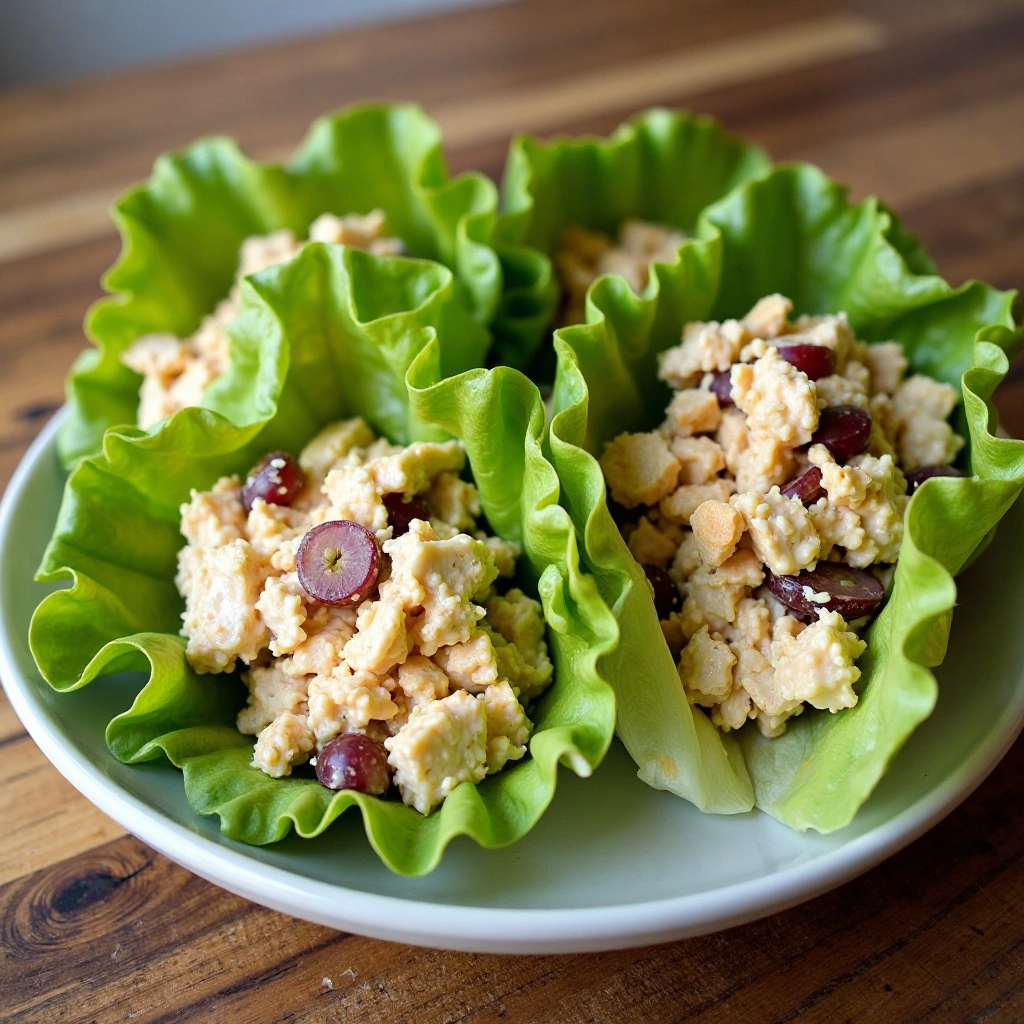
Why This Works
These wraps are low-carb, protein-packed, and crunchy! Using lettuce instead of bread keeps them from getting soggy and adds refreshing crispness.
Ingredients
- 1 cup cooked chicken breast, diced or shredded
- 3 tablespoons mayonnaise
- 1 tablespoon Dijon mustard
- ¼ cup celery, finely diced
- ¼ cup grapes, halved
- 2 tablespoons slivered almonds (optional, omit for nut-free)
- Salt and pepper to taste
- 4-5 large romaine or butter lettuce leaves
Step-by-Step Instructions
In a medium bowl, combine the diced chicken with mayonnaise and Dijon mustard. Mix thoroughly until the chicken is evenly coated.
Add the finely diced celery for crunch and halved grapes for sweetness. These ingredients add amazing texture and flavor contrast.
Fold in the slivered almonds if using. Season with salt and pepper to taste. Mix everything together gently.
Cover and refrigerate the chicken salad for at least 30 minutes. This chilling time allows the flavors to marry beautifully.
When ready to pack, wash and dry the lettuce leaves thoroughly. Pat them completely dry—wet lettuce makes the filling slide around.
Pack the chicken salad in one compartment and the lettuce leaves in another. Include assembly instructions for your child: scoop the chicken salad onto a lettuce leaf and roll it up.
This method prevents sogginess and keeps everything fresh until lunchtime. Include a spoon for easy serving.
8. Tuna Salad Sandwich Alternative

Why This Works
Using croissants or pita pockets instead of regular bread adds a special touch and holds up better in lunchboxes without becoming mushy.
Ingredients
- 1 can (5 oz) tuna in water, drained
- 2 tablespoons mayonnaise
- 1 teaspoon lemon juice
- 2 tablespoons celery, finely diced
- 1 tablespoon red onion, minced (optional)
- Salt and pepper to taste
- 2 mini croissants or 1 pita pocket
- Lettuce leaves
- Tomato slices
Step-by-Step Instructions
Open and drain the tuna can completely. Press out as much water as possible using a fork or paper towels. Excess water makes the salad watery.
In a bowl, combine the drained tuna with mayonnaise and lemon juice. The lemon juice brightens the flavor and cuts through the richness.
Add the finely diced celery and minced onion if using. These ingredients provide essential crunch and flavor depth.
Season with salt and pepper to taste. Mix everything together thoroughly until well combined and creamy.
Cover and refrigerate the tuna salad for at least 15 minutes. This firms it up and makes it easier to handle.
When packing, slice the croissants horizontally or open the pita pocket carefully. Keep the bread separate from the tuna salad if possible.
Pack the tuna salad in a small container and include lettuce and tomato separately. This prevents sogginess—kids can assemble at lunchtime, or you can assemble just before packing if your child prefers it ready-to-eat.
9. Fruit and Cheese Kabobs
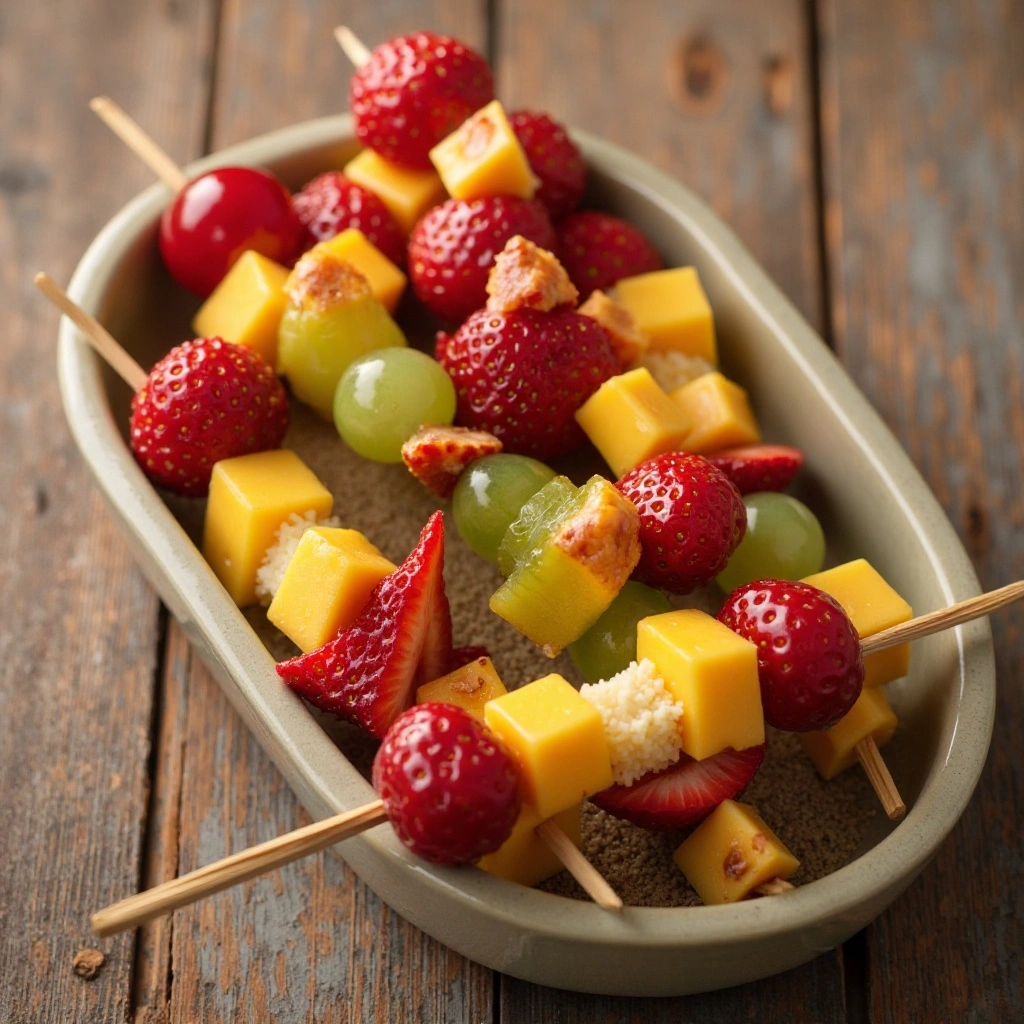
Why This Works
Everything tastes better on a stick! These kabobs are fun to eat, naturally portion-controlled, and combine protein with natural sweetness.
Ingredients
- 12-15 grapes (red or green)
- 8-10 strawberries
- 12-15 cheese cubes (cheddar, mozzarella, or colby jack)
- 8-10 melon cubes (cantaloupe or honeydew)
- 6-8 wooden skewers or toothpicks
Step-by-Step Instructions
Wash all fruits thoroughly and pat them completely dry. Moisture can make them slip off the skewers.
Cut the cheese into ½-inch cubes. This size is perfect for threading and bite-sized eating. Cut the strawberries in half and the melon into similar-sized cubes.
If using wooden skewers, consider cutting them shorter for easier lunchbox packing. Toothpicks work great for younger kids but provide fewer pieces per stick.
Thread the fruits and cheese onto skewers in an alternating pattern. Try: grape, cheese, strawberry, cheese, melon, cheese. The pattern creates visual interest.
Continue alternating until the skewer is filled, leaving about an inch at each end for easy handling.
Arrange the kabobs in a container that keeps them from rolling around. You can also use a flat container and lay them side by side.
Pack with an ice pack to keep everything fresh and crisp. The cheese especially needs to stay cool.
10. Build-Your-Own Wrap Kit
Why This Works
This interactive lunch puts kids in control while ensuring they eat a balanced meal. It’s perfect for picky eaters who want to customize everything!
Ingredients
- 2 small flour tortillas
- 3 tablespoons cream cheese or hummus
- 3 slices deli turkey
- 2 slices cheese
- ¼ cup shredded lettuce
- 4-5 cucumber slices
- 4-5 tomato slices
- Optional: ranch or honey mustard in small container
Step-by-Step Instructions
Choose a lunch container with multiple compartments—at least 4-5 sections work best for this kit.
Place the tortillas in the largest compartment. If they’re too large, cut them in half for easier packing.
Pack the cream cheese or hummus in a small, leak-proof container with a tight lid. Include a small spreading knife or spoon.
Roll or fold the deli meat slices and place them in one compartment. Rolling them makes them easier to grab and layer.
Stack the cheese slices in another section. Keeping proteins together makes the container more organized.
Place the shredded lettuce in one compartment and arrange cucumber and tomato slices in another. The separation prevents the lettuce from wilting.
If including a sauce, pack it in the smallest container with the tightest seal. Place it in the center to prevent leaking.
Include simple assembly instructions: spread the cream cheese on the tortilla, add meat, cheese, veggies, fold in the sides, and roll up tightly.
What to Serve These Cold Lunches With
Fresh Fruit Sides: Apple slices with a squeeze of lemon juice to prevent browning, orange segments, berries in a small container, or a small fruit cup. Fruit adds natural sweetness and essential vitamins.
Crunchy Snacks: Pretzels, popcorn, veggie chips, or whole grain crackers provide satisfying crunch and help round out the meal with whole grains.
Treats: A small cookie, granola bar, fruit leather, or dark chocolate squares make lunch feel special without going overboard on sugar.
Hydration: Always include water as the primary drink. Avoid sugary juices that can cause energy crashes during afternoon classes.
Dipping Sauces: Small containers of ranch, hummus, or honey mustard transform ordinary vegetables into exciting snacks.
Top Tips for Perfecting Cold Lunch Ideas for Kids
Temperature Control Is Critical: Always use insulated lunch bags with ice packs. Cold foods need to stay below 40°F to remain safe. I use two small ice packs in every lunch bag—one on the bottom and one on top.
Invest in Quality Containers: Leak-proof, divided containers are game-changers. Brands with secure lids prevent spills and keep foods separated. Clear containers let kids see what’s inside without opening everything.
Prep in Batches: Sunday meal prep saves sanity! Wash and chop all vegetables for the week, cook pasta for salads, and prepare protein options in advance. Store everything in labeled containers.
Get Kids Involved: Let children help choose and pack their lunches on weekends. They’re more likely to eat what they’ve helped create. My kids pick three items from each food group.
The One-Bite Rule: For new foods, implement a one-bite rule. No pressure to finish, just try one bite. This reduced my kids’ pickiness dramatically over time.
Avoid Sogginess: Pack wet ingredients separately from dry ones. Use lettuce as a barrier between bread and tomatoes. Pack dressings and sauces in separate containers.
Consider Allergies: Always check your school’s policy on allergens. Many schools are nut-free, so have alternative protein sources ready like sunflower seed butter or hummus.
Make It Colorful: Kids eat with their eyes first! Include foods of different colors—aim for a rainbow in every lunch. The variety ensures diverse nutrients too.
Room Temperature Test: Before packing a new recipe, let it sit at room temperature for 3-4 hours at home. If it tastes good, it’ll work for school lunch.
Storing and Reheating Tips
Same-Day Preparation: Most of these cold lunches are best prepared the morning of or the night before. Prepare them no more than 12 hours in advance for optimal freshness and food safety.
Proper Refrigeration: Store packed lunches in the refrigerator until leaving home. Cold food should start cold and stay cold with ice packs throughout the morning.
Container Cleaning: Wash lunch containers with hot, soapy water immediately after school. Baked-on food is harder to remove and can harbor bacteria. Air dry completely before storing.
Weekly Prep Strategy: Wash and chop vegetables on Sunday, storing them in airtight containers with damp paper towels to maintain crispness. Cook grains and pasta in bulk and refrigerate in portions. These components stay fresh for 4-5 days.
Freezer-Friendly Options: Wraps and pinwheels can be frozen! Make a big batch, wrap individually in plastic wrap, then store in freezer bags. Transfer one to the lunchbox in the morning—it’ll thaw by lunchtime and keep other items cold.
Not Recommended for Freezing: Yogurt parfaits, salads with mayonnaise-based dressings, and fresh vegetable boxes don’t freeze well. These should always be made fresh.
Leftover Management: If your child brings food home, discard anything that’s been sitting at room temperature for more than 4 hours. It’s not worth the risk of foodborne illness.
Tips for Avoiding Common Cold Lunch Mistakes
Mistake 1 – Overpacking: Kids have limited lunch time! Pack realistic portions your child can finish in 20-25 minutes. Better to pack less and have them ask for more.
Mistake 2 – Too Many New Foods: Introduce one new item at a time alongside familiar favorites. Five new foods at once = uneaten lunch and a hungry child.
Mistake 3 – Forgetting Utensils: Include necessary tools! Pack a spoon for yogurt parfaits, a fork for pasta salad, and consider small spreading knives for build-your-own options.
Mistake 4 – Ignoring Texture: All soft or all crunchy gets boring. Mix textures—pair creamy hummus with crunchy veggies, soft wraps with crispy apple slices.
Mistake 5 – Skipping Protein: Protein keeps kids full and focused. Every lunch should include a solid protein source like meat, cheese, yogurt, beans, or nut butter.
Mistake 6 – Complicated Assembly: If your child can’t easily eat it, they won’t. Keep assembly simple or do it yourself if your child is young.
Mistake 7 – No Variety: Rotating through these 10 ideas weekly prevents boredom. Kids need variety to stay interested and get diverse nutrients.
Mistake 8 – Forgetting Napkins: Always include napkins or wet wipes! Messy hands can prevent kids from finishing their lunch.
Nutrition Information (Per Serving – Average)
| Nutrient | Amount |
|---|---|
| Calories | 350-450 |
| Protein | 15-25g |
| Carbohydrates | 35-45g |
| Fiber | 4-7g |
| Fat | 12-18g |
| Sodium | 400-650mg |
| Sugar | 8-15g |
Note: Nutrition varies significantly by specific recipe and portions. These are estimated averages across all 10 lunch ideas.
Frequently Asked Questions
How do I keep cold lunches fresh without refrigeration?
Use an insulated lunch bag with at least two ice packs—one on the bottom and one on top of the lunch container. Freeze a juice box or water bottle overnight and pack it alongside the lunch. As it thaws, it keeps everything cold. Pre-chill the lunch bag by storing it in the freezer for 30 minutes before packing. Start with cold ingredients straight from the refrigerator rather than room temperature items.
What cold lunch ideas work for nut-free schools?
Sunflower seed butter is an excellent peanut butter alternative! Try sunflower seed butter and banana sushi, hummus-based wraps and veggie boxes, turkey and cheese pinwheels, pasta salad with chicken, Greek yogurt parfaits, and build-your-own wrap kits. Always check ingredient labels as some granolas and crackers contain nuts or are processed in facilities with nuts.
How can I prevent sandwiches from getting soggy?
Use barriers like lettuce leaves between bread and wet ingredients like tomatoes. Pack components separately and let kids assemble at lunchtime. Toast bread lightly before making sandwiches—this creates a moisture barrier. Spread butter, cream cheese, or hummus on bread as a protective layer. Consider using croissants, pita bread, or tortillas which hold up better than regular sandwich bread.
What if my child doesn’t have time to eat everything?
Pack smaller portions of 3-4 items instead of large portions of everything. Prioritize foods you want them to eat first—protein and vegetables before treats. Use smaller containers that look full rather than large containers that look empty. Kids are more likely to finish lunch when it doesn’t feel overwhelming. Time them at home to see how much they can realistically eat in 20 minutes.
How long can these cold lunches safely sit at room temperature?
According to food safety guidelines, cold foods should not sit at temperatures between 40°F and 140°F for more than 2 hours. With proper ice packs and insulated bags, lunches stay safe for 4-5 hours. If your child has a later lunch period (after noon), use extra ice packs or consider freezing certain components. When in doubt, send foods that are naturally shelf-stable like crackers, pretzels, and sealed cheese sticks.
Can I make these lunches the night before?
Yes, most of these options are perfect for night-before prep! Assemble wraps, pinwheels, pasta salads, and chicken salad the evening before and refrigerate. However, pack yogurt parfaits the morning of to maintain the granola crunch. Keep wet and dry ingredients separate until morning for items like veggie boxes with hummus. Lettuce wraps should be assembled in the morning or packed deconstructed for best results.
What are the best containers for cold school lunches?
Invest in BPA-free, leak-proof containers with multiple compartments. Look for containers with secure locking mechanisms and silicone seals. Bento-style boxes with 4-6 divided sections work beautifully for variety without mixing. Choose clear containers so kids can see their food without opening them. Insulated lunch bags specifically designed for kids’ lunches maintain temperature better than regular bags. Small containers with screw-top lids are perfect for dips, dressings, and sauces.
How do I get my picky eater to try these new lunch ideas?
Start with one familiar item and one new item per lunch. Let kids help choose and prepare lunches on weekends—ownership increases acceptance. Make food fun with cookie cutters, colorful toothpicks, and creative presentation. Implement a “no thank you” bite policy—just try one bite, no pressure. Offer the same new food multiple times in different ways; it takes 10-15 exposures for kids to accept new foods. Celebrate small victories and never punish for not eating.
Final Thoughts
Packing cold lunches doesn’t have to be stressful or repetitive! These 10 cold lunch ideas for kids at school have transformed my morning routine from chaotic to calm. The key is variety, preparation, and knowing what your children genuinely enjoy eating.
Remember that perfection isn’t the goal—nourishment and happiness are. Some days my kids eat everything, other days they don’t. That’s normal! Keep offering variety, involving them in the process, and celebrating the small wins.
Start with two or three ideas that appeal to your family, master those, then gradually add more to your rotation. Before you know it, you’ll have a arsenal of lunch options that make both you and your kids happy.
Which lunch idea will you try first? Let me know in the comments below, and don’t forget to share your own lunch-packing tips! Together, we can make school lunches easier for everyone.
Happy lunch packing! 🍎