15 Healthy Snacks Vegetarian That Actually Taste Amazing
You know that 3 PM slump when your stomach starts rumbling and all you can think about is reaching for that bag of chips? I’ve been there more times than I’d like to admit! But here’s the thing – snacking doesn’t have to derail your healthy eating goals.
After years of experimenting in my kitchen, I’ve discovered that the secret to satisfying snacks is finding the perfect balance between nutrition and flavor. These 15 healthy snacks vegetarian are not only delicious but also packed with nutrients that’ll keep you energized throughout the day.Trust me, once you try my crispy roasted chickpeas, you’ll forget all about those processed snacks sitting in your pantry!
What Are Healthy Vegetarian Snacks?
Ever wondered why some snacks leave you hungry an hour later while others keep you satisfied? Healthy snacks vegetarian are those magical bites that combine protein, fiber, and healthy fats without any animal products. They’re not just rabbit food – they’re flavor-packed, crunchy, creamy, or sweet treats that nourish your body and taste amazing.
As my grandmother always said, “Good food is the foundation of genuine happiness,” and these snacks prove she was absolutely right! Whether you’re a committed vegetarian or just trying to eat more plant-based meals, these snacks will make your taste buds dance.
Why You’ll Love These Healthy Vegetarian Snacks
They’re Budget-Friendly and Nutritious
Let’s talk about saving money while eating well. Making your own snacks at home costs a fraction of what you’d spend on pre-packaged options at the store. A bag of chickpeas that costs less than two dollars can be transformed into several servings of crunchy, protein-rich snacks. Plus, you control exactly what goes into your food – no mystery ingredients or excessive sodium!
Endless Flavor Possibilities
The beauty of these vegetarian snacks is their versatility. From savory spiced nuts to sweet energy balls, there’s something for every craving. You can customize each recipe with your favorite herbs, spices, and toppings. Love a little heat? Add some cayenne pepper. Prefer sweeter options? Drizzle with honey or maple syrup.
Quick and Easy Preparation
Most of these snacks take less than 30 minutes to prepare, and many can be made in advance for grab-and-go convenience. If you enjoyed my quinoa energy bites recipe, you’ll find these snacks equally simple and satisfying. They’re perfect for busy weekdays, post-workout refueling, or late-night study sessions. Ready to discover your new favorite snack? Let’s dive in!
1. Crispy Roasted Chickpeas
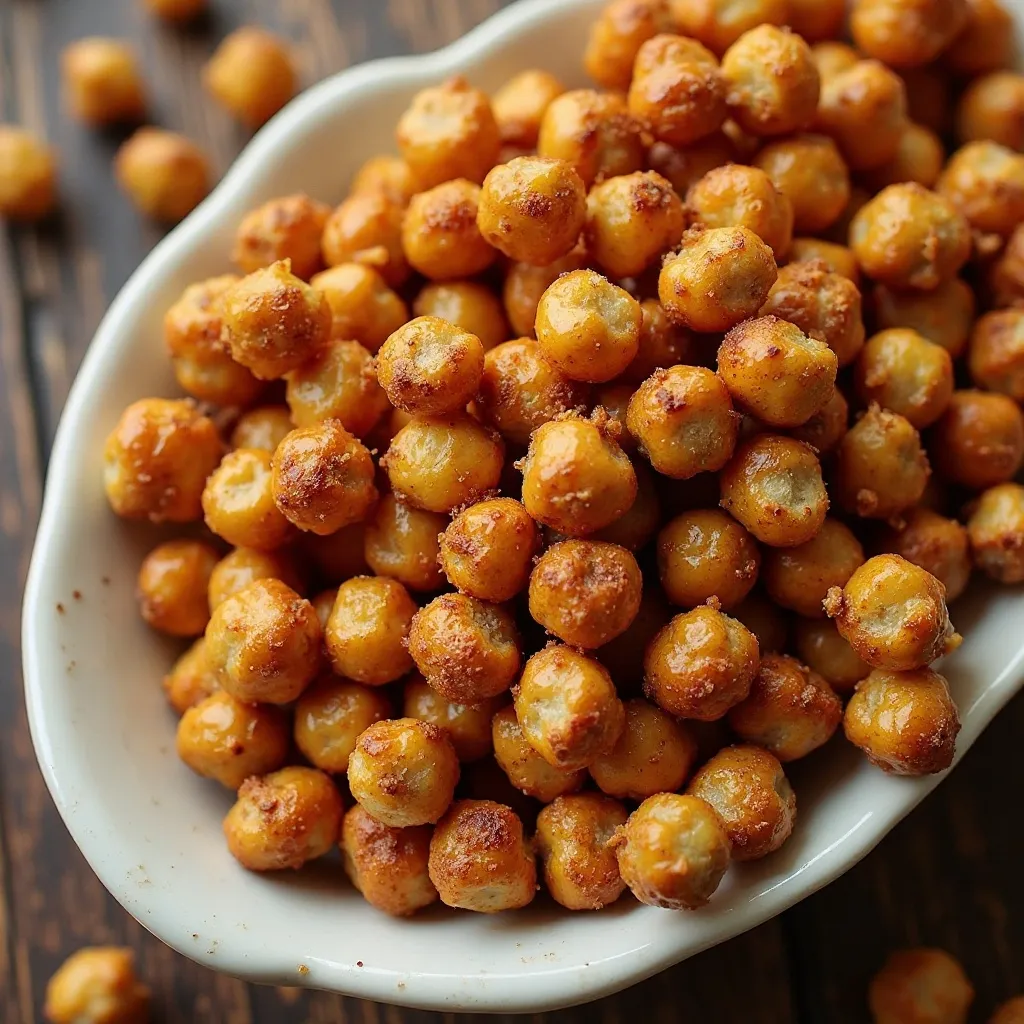
What Makes This Snack Special
Roasted chickpeas are the ultimate crunchy snack that rivals any chip you’ve ever had. They’re loaded with protein and fiber, making them incredibly satisfying. The best part? You can season them a thousand different ways.
Key Ingredients for Roasted Chickpeas
- 2 cans (15 oz each) chickpeas, drained and rinsed
- 2 tablespoons olive oil
- 1 teaspoon sea salt
- 1 teaspoon garlic powder
- 1 teaspoon smoked paprika
- ½ teaspoon cumin
- Optional: cayenne pepper for heat
Step-by-Step Instructions
Pat the chickpeas completely dry using paper towels or a clean kitchen towel. This is crucial for achieving that perfect crunch. Any moisture will make them soggy instead of crispy.
Preheat your oven to 400°F and line a baking sheet with parchment paper.
Toss the dried chickpeas with olive oil in a large bowl, making sure each chickpea is lightly coated.
Spread the chickpeas in a single layer on the prepared baking sheet. Don’t overcrowd them or they won’t get crispy.
Roast for 25-30 minutes, shaking the pan every 10 minutes to ensure even cooking.
Mix your spices together in a small bowl. Once the chickpeas are golden and crunchy, remove them from the oven and immediately toss with the spice mixture while still hot.
Let them cool completely before storing. They’ll continue to get crispier as they cool.
Storing Tips
Store in an airtight container at room temperature for up to 5 days. If they lose their crunch, pop them back in a 350°F oven for 5 minutes.
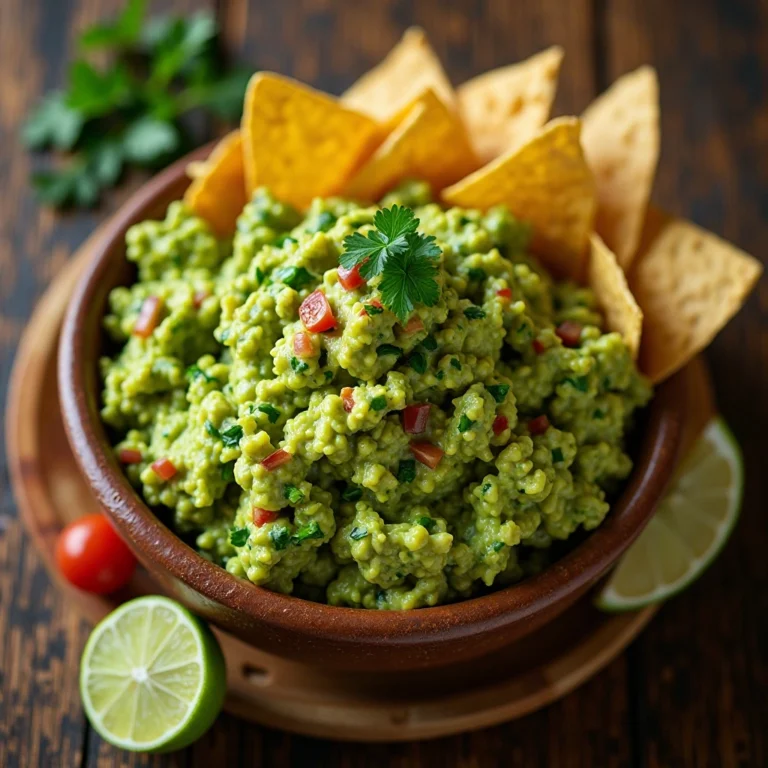
2. Veggie Sticks with Homemade Hummus

What Makes This Snack Special
This classic combination never gets old. Fresh, crunchy vegetables paired with creamy, protein-rich hummus create the perfect balance of textures and flavors. It’s colorful, refreshing, and incredibly nutritious.
Key Ingredients for Hummus
- 1 can (15 oz) chickpeas, drained (reserve liquid)
- ¼ cup tahini
- 3 tablespoons lemon juice
- 2 cloves garlic, minced
- 2 tablespoons olive oil
- ½ teaspoon cumin
- Salt to taste
- 2-3 tablespoons reserved chickpea liquid (aquafaba)
- Assorted vegetables: carrots, celery, bell peppers, cucumber
Step-by-Step Instructions
Add chickpeas, tahini, lemon juice, and garlic to your food processor.
Blend until the mixture becomes a thick paste, scraping down the sides as needed.
With the processor running, slowly drizzle in the olive oil through the feed tube.
Add cumin and salt, then blend again.
Add the reserved chickpea liquid one tablespoon at a time while blending until you reach your desired creamy consistency.
Taste and adjust seasonings. Want it tangier? Add more lemon juice. Need more depth? Add another pinch of cumin.
Transfer to a bowl and create a well in the center with the back of a spoon. Drizzle with olive oil and sprinkle with paprika if desired.
Cut your vegetables into sticks or bite-sized pieces for easy dipping.
Storing Tips
Store hummus in an airtight container in the refrigerator for up to 5 days. Keep cut vegetables in separate containers with a damp paper towel to maintain freshness.
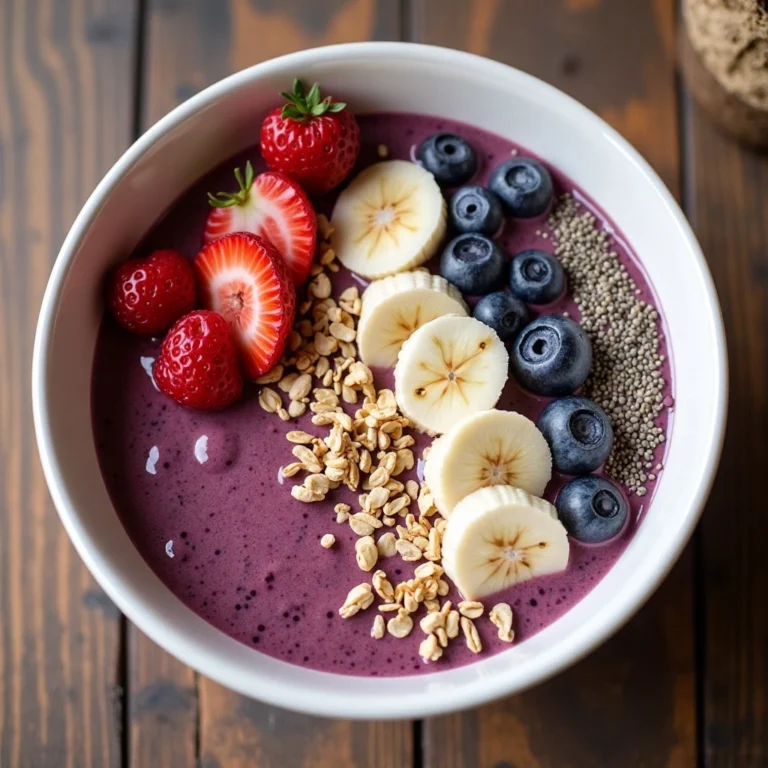
3. Greek Yogurt Parfait with Granola
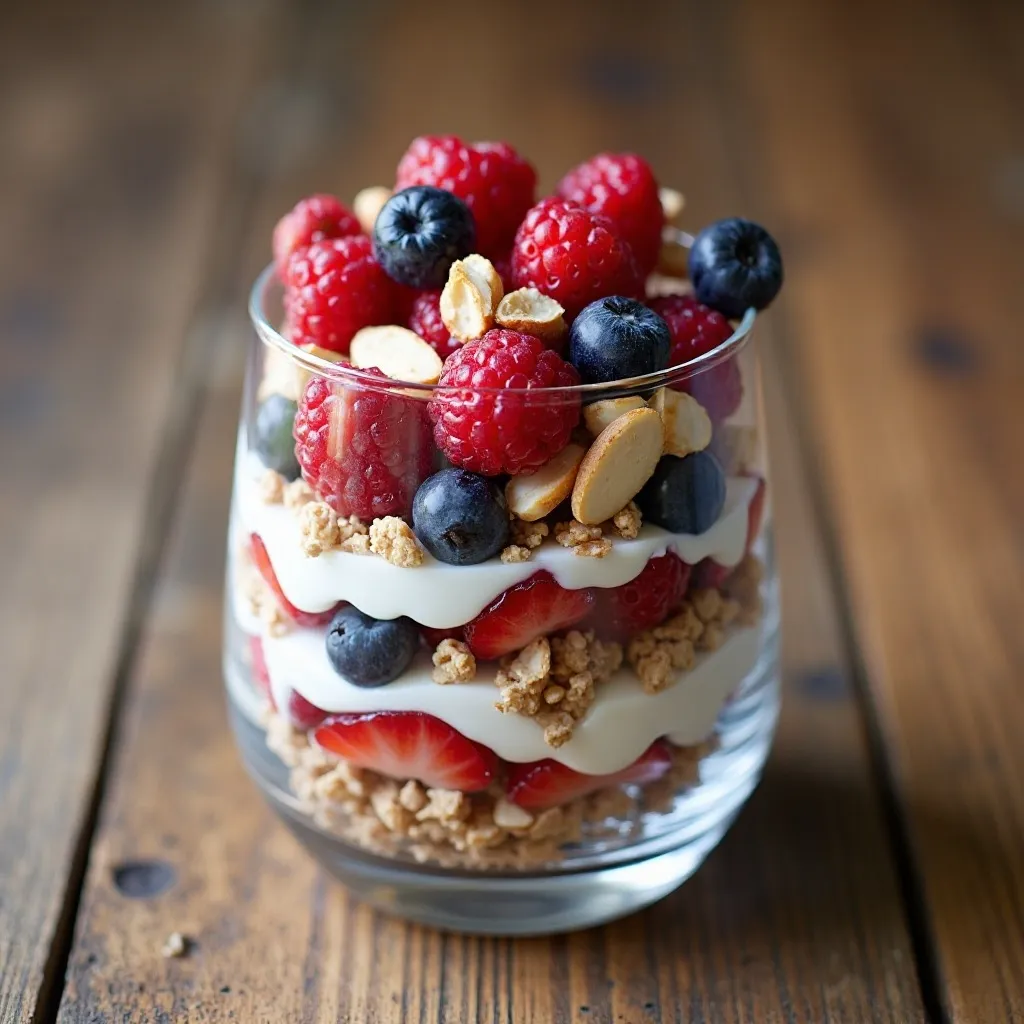
What Makes This Snack Special
Layers of creamy Greek yogurt, crunchy granola, and fresh berries create a snack that feels like dessert but fuels your body like a champion. It’s rich in protein, probiotics, and antioxidants.
Key Ingredients for Yogurt Parfait
- 1 cup plain Greek yogurt
- ½ cup granola (store-bought or homemade)
- ½ cup mixed fresh berries
- 1 tablespoon honey or maple syrup
- 1 tablespoon chia seeds (optional)
- A handful of sliced almonds
Step-by-Step Instructions
Start with a glass or jar for beautiful layers.
Spoon a layer of Greek yogurt into the bottom, about one-third of your total amount.
Drizzle a little honey over the yogurt layer.
Add a layer of granola, spreading it evenly.
Top with a layer of fresh berries.
Repeat the layers until you’ve used all your ingredients, ending with berries and a sprinkle of nuts on top.
If using chia seeds, sprinkle them between the yogurt layers for extra nutrition and a fun texture.
Serve immediately for the crunchiest granola, or prepare the night before and store in the refrigerator.
Storing Tips
If making ahead, store the granola separately and add just before eating to maintain crunchiness. The assembled parfait (without granola) keeps for up to 24 hours refrigerated.
4. Avocado Toast with Everything Seasoning

What Makes This Snack Special
Avocado toast has earned its trendy reputation. The creamy avocado spread on crunchy whole-grain toast creates an irresistible combination that’s packed with healthy fats and fiber.
Key Ingredients for Avocado Toast
- 2 slices whole-grain bread
- 1 ripe avocado
- 1 teaspoon lemon juice
- Salt and pepper to taste
- 2 teaspoons everything bagel seasoning
- Cherry tomatoes, halved (optional)
- Red pepper flakes (optional)
- Microgreens for topping
Step-by-Step Instructions
Toast your bread until golden and crispy. The level of toastiness is personal preference, but I like mine with a good crunch.
While the bread toasts, cut your avocado in half and remove the pit.
Scoop the avocado flesh into a bowl and mash with a fork until you reach your desired consistency. I like mine slightly chunky.
Add lemon juice, salt, and pepper to the mashed avocado and mix well. The lemon juice prevents browning and adds brightness.
Spread the avocado mixture generously on your toasted bread.
Sprinkle everything bagel seasoning over the top.
Add optional toppings like cherry tomatoes, red pepper flakes, or microgreens for extra flavor and nutrition.
Serve immediately while the toast is still warm and crispy.
Serving Tip
This snack is best enjoyed fresh. The lemon juice helps prevent browning, but avocado oxidizes quickly once cut.
5. No-Bake Energy Balls
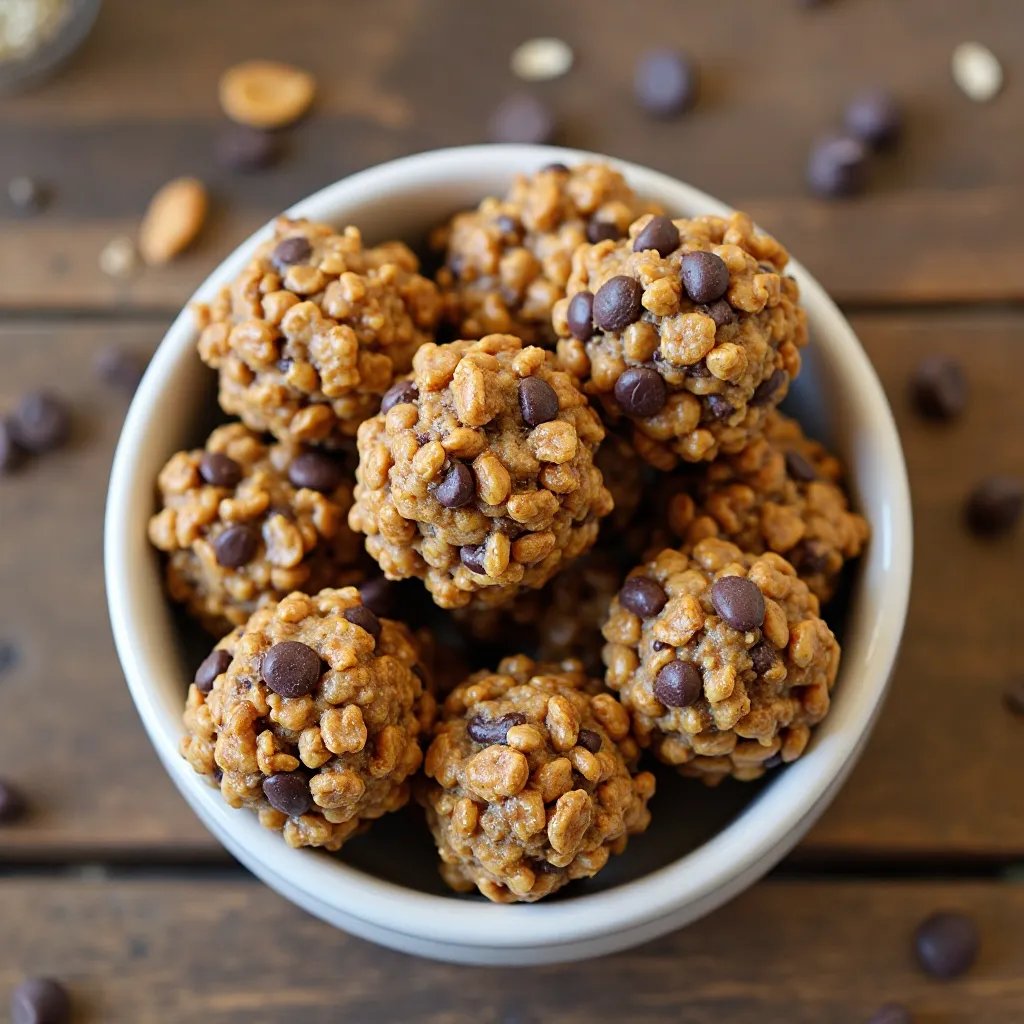
What Makes This Snack Special
These little powerhouses are perfect for busy days when you need sustained energy. They’re naturally sweet, packed with protein, and require zero baking. Plus, they’re incredibly portable!
Key Ingredients for Energy Balls
- 1 cup rolled oats
- ½ cup natural peanut butter
- ⅓ cup honey
- ½ cup ground flaxseed
- ½ cup mini chocolate chips
- 1 teaspoon vanilla extract
- Pinch of salt
Step-by-Step Instructions
Combine all ingredients in a large mixing bowl.
Stir everything together until well combined. The mixture should be sticky but manageable. If it’s too dry, add a tablespoon of honey. Too wet? Add more oats.
Cover the bowl and refrigerate for 30 minutes. This makes the mixture easier to roll and helps the balls hold their shape.
Once chilled, use a small cookie scoop or your hands to roll the mixture into balls about 1 inch in diameter.
Place the balls on a parchment-lined plate or baking sheet.
Return to the refrigerator for another 15 minutes to firm up.
Transfer to an airtight container with parchment paper between layers to prevent sticking.
Storing Tips
Store in the refrigerator for up to 2 weeks or freeze for up to 3 months. They taste great straight from the freezer too!
6. Caprese Skewers
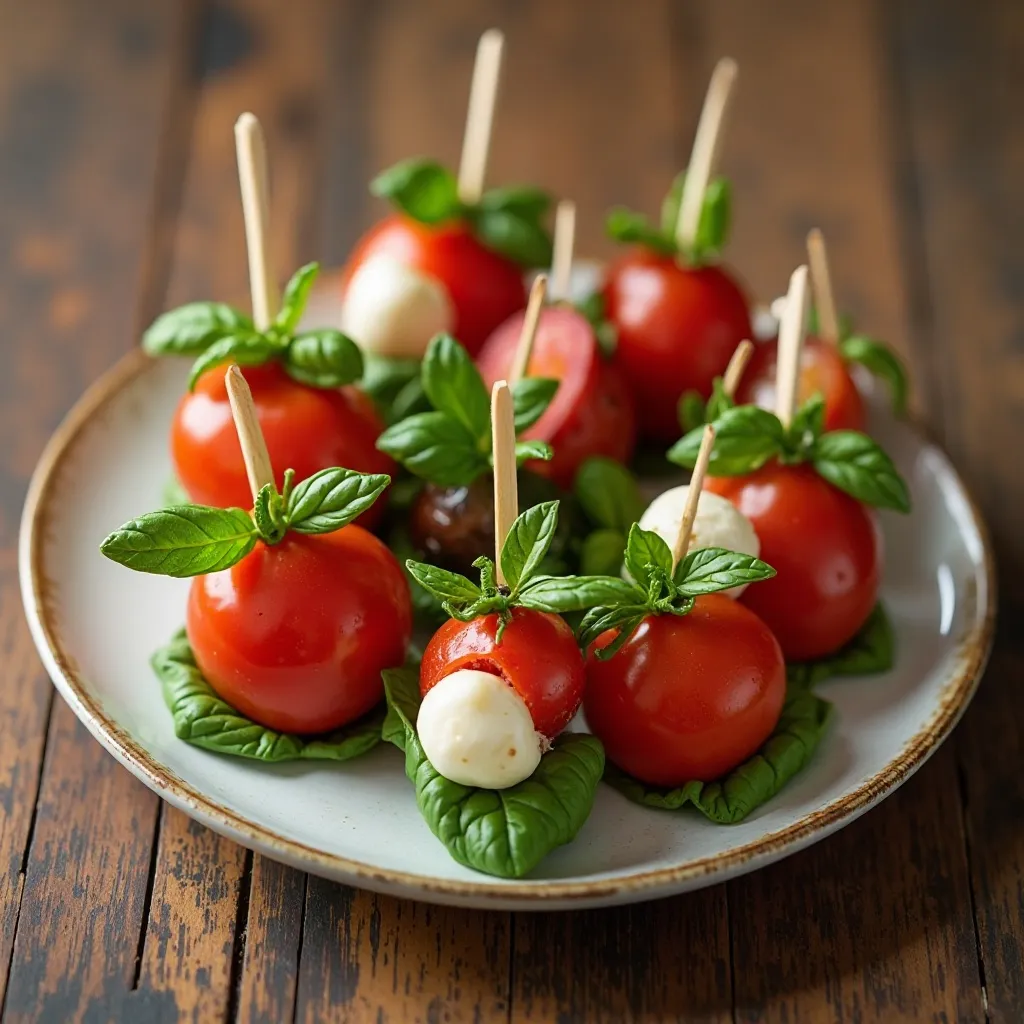
What Makes This Snack Special
These colorful skewers bring Italian flavors to your snack time. They’re fresh, light, and look absolutely gorgeous on a plate. Perfect for entertaining or treating yourself!
Key Ingredients for Caprese Skewers
- 1 pint cherry tomatoes
- 8 oz fresh mozzarella balls (ciliegine)
- Fresh basil leaves
- 2 tablespoons balsamic glaze
- 1 tablespoon olive oil
- Salt and pepper to taste
- Wooden skewers or toothpicks
Step-by-Step Instructions
Wash and dry your cherry tomatoes and basil leaves thoroughly.
Drain the mozzarella balls and pat them dry with paper towels.
Thread one cherry tomato onto a skewer, followed by a folded basil leaf, then a mozzarella ball.
Repeat the pattern if your skewers are long enough, or keep them simple with just one of each.
Arrange the finished skewers on a serving plate.
Drizzle with balsamic glaze and olive oil.
Sprinkle with a pinch of salt and freshly cracked black pepper.
Serve immediately or refrigerate for up to 2 hours before serving.
Serving Tip
Let the skewers sit at room temperature for 10 minutes before serving for the best flavor. Cold mozzarella doesn’t have as much taste!
7. Spiced Roasted Nuts
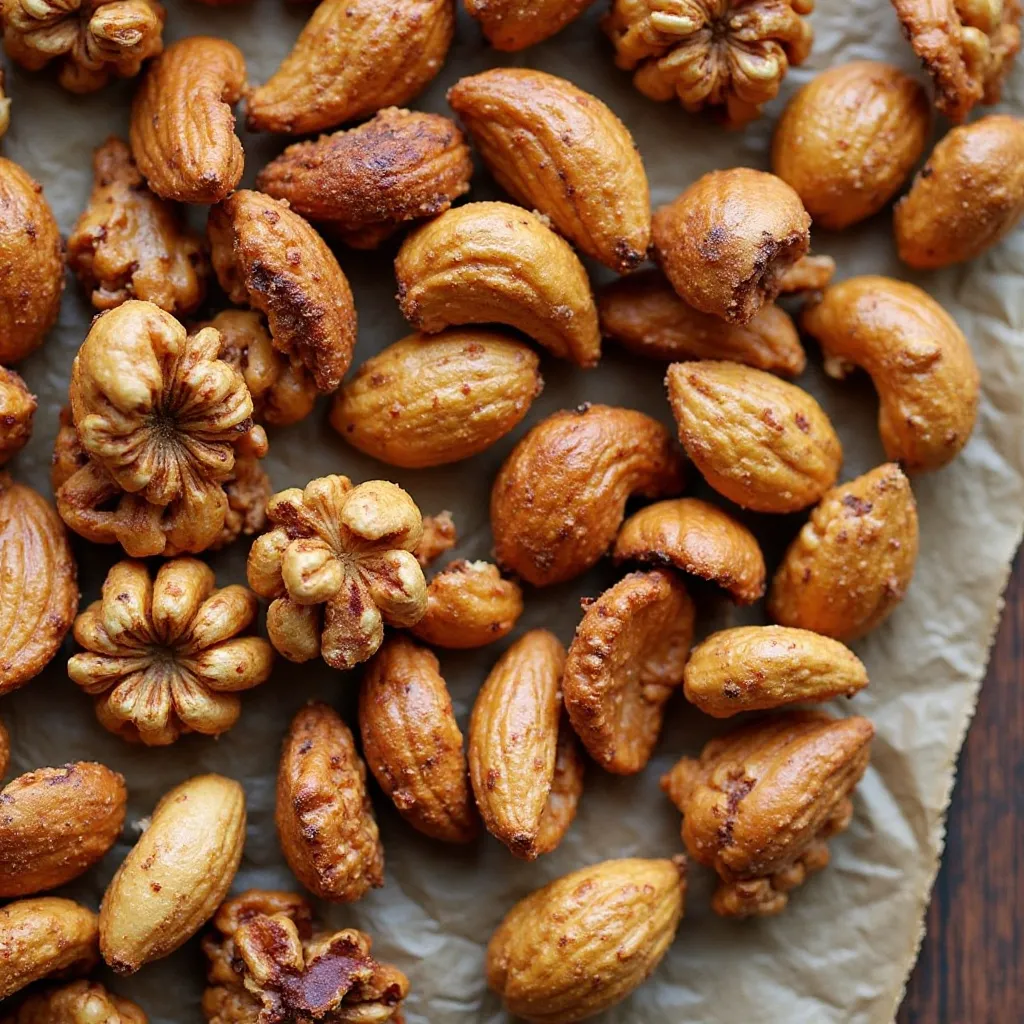
What Makes This Snack Special
Store-bought flavored nuts are expensive and often loaded with unhealthy oils and excessive salt. Making your own means controlling the ingredients while creating amazing flavor combinations.
Key Ingredients for Spiced Nuts
- 2 cups mixed raw nuts (almonds, cashews, walnuts)
- 1 tablespoon olive oil or melted coconut oil
- 1 tablespoon maple syrup
- 1 teaspoon smoked paprika
- ½ teaspoon cumin
- ½ teaspoon garlic powder
- ¼ teaspoon cayenne pepper
- 1 teaspoon sea salt
- Fresh rosemary (optional)
Step-by-Step Instructions
Preheat your oven to 325°F. A lower temperature ensures the nuts toast evenly without burning.
Line a baking sheet with parchment paper for easy cleanup.
Combine all the spices and salt in a small bowl and mix well.
In a large bowl, toss the nuts with olive oil and maple syrup until evenly coated.
Add the spice mixture and toss again until every nut is coated with the flavorful blend.
Spread the nuts in a single layer on the prepared baking sheet. Don’t pile them up or they won’t roast evenly.
Roast for 15-20 minutes, stirring every 5 minutes to prevent burning and ensure even toasting.
The nuts are done when they’re fragrant and golden brown.
If using rosemary, strip the leaves from the stem and sprinkle over the hot nuts immediately after removing from the oven.
Let cool completely on the baking sheet. They’ll continue to get crunchier as they cool.
Storing Tips
Store in an airtight container at room temperature for up to 2 weeks. These also make wonderful gifts!
8. Cucumber Rounds with Cream Cheese
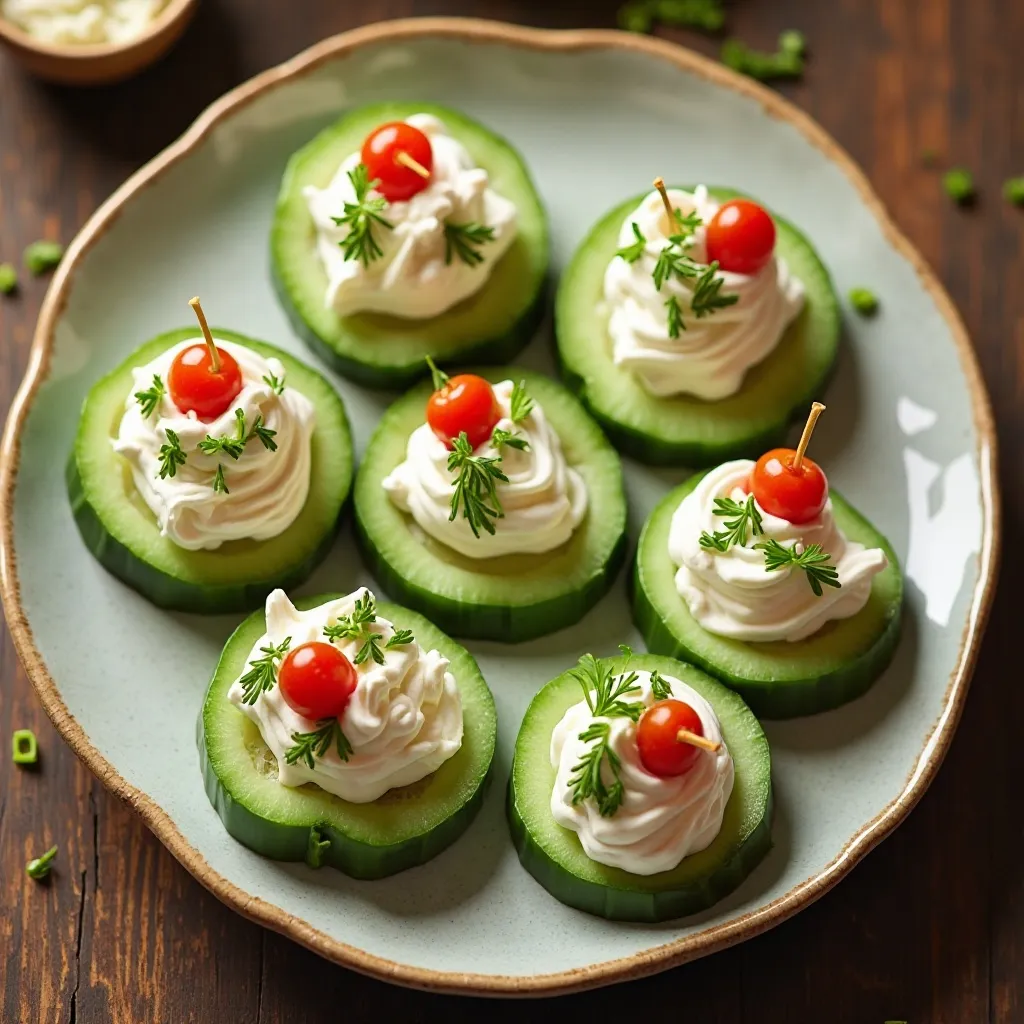
What Makes This Snack Special
This elegant yet simple snack is refreshing, light, and satisfying. The cool crunch of cucumber pairs perfectly with creamy, tangy cream cheese. It’s like a mini bagel without the carbs!
Key Ingredients for Cucumber Rounds
- 1 large English cucumber
- 4 oz cream cheese, softened
- 1 tablespoon fresh dill, chopped
- 1 teaspoon lemon zest
- 1 clove garlic, minced
- Salt and pepper to taste
- Cherry tomatoes for topping
- Fresh chives for garnish
Step-by-Step Instructions
Wash the cucumber and slice it into rounds about ½ inch thick. Pat them dry with paper towels to remove excess moisture.
In a bowl, mix the softened cream cheese with dill, lemon zest, and minced garlic.
Add a pinch of salt and pepper to the cream cheese mixture and stir until smooth and well combined.
Using a small spoon or a piping bag, top each cucumber round with a dollop of the herbed cream cheese mixture.
Garnish with a small piece of cherry tomato and a sprinkle of fresh chives.
Arrange on a plate and serve immediately, or cover and refrigerate for up to 2 hours.
Serving Tip
These are best assembled shortly before serving to keep the cucumber crisp and fresh.
9. Apple Slices with Almond Butter
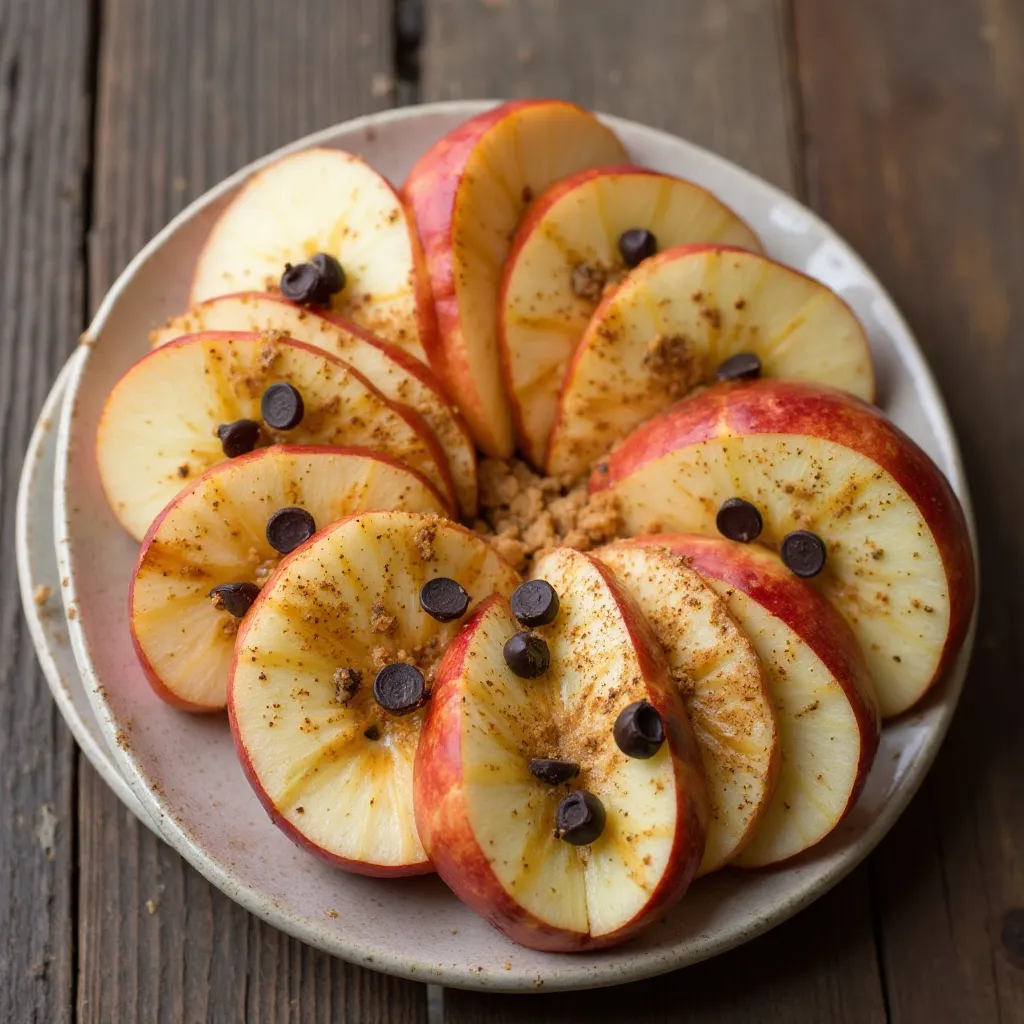
What Makes This Snack Special
This is the ultimate combination of sweet and nutty flavors with a satisfying crunch. Apples provide natural sweetness and fiber while almond butter delivers protein and healthy fats.
Key Ingredients for Apple Almond Snack
- 2 medium apples (Honeycrisp or Granny Smith work best)
- ¼ cup almond butter
- 1 tablespoon honey
- 1 teaspoon cinnamon
- 2 tablespoons chopped walnuts or pecans
- Optional: dark chocolate chips for drizzling
Step-by-Step Instructions
Wash your apples thoroughly and pat them dry.
Core the apples using an apple corer or knife, then slice into ¼ inch thick rounds or wedges.
To prevent browning, squeeze a little lemon juice over the apple slices and toss gently.
Arrange the apple slices on a plate in a single layer or fanned out attractively.
In a small bowl, mix the almond butter with honey until smooth and slightly thinned for easier spreading.
Drizzle or spread the almond butter mixture over the apple slices.
Sprinkle with cinnamon and chopped nuts.
If using chocolate chips, melt them in the microwave in 15-second intervals and drizzle over the top.
Serve immediately for the best texture and flavor.
Serving Tip
This snack is perfect for kids’ lunchboxes. Pack the components separately and assemble when ready to eat.
10. Edamame with Sea Salt
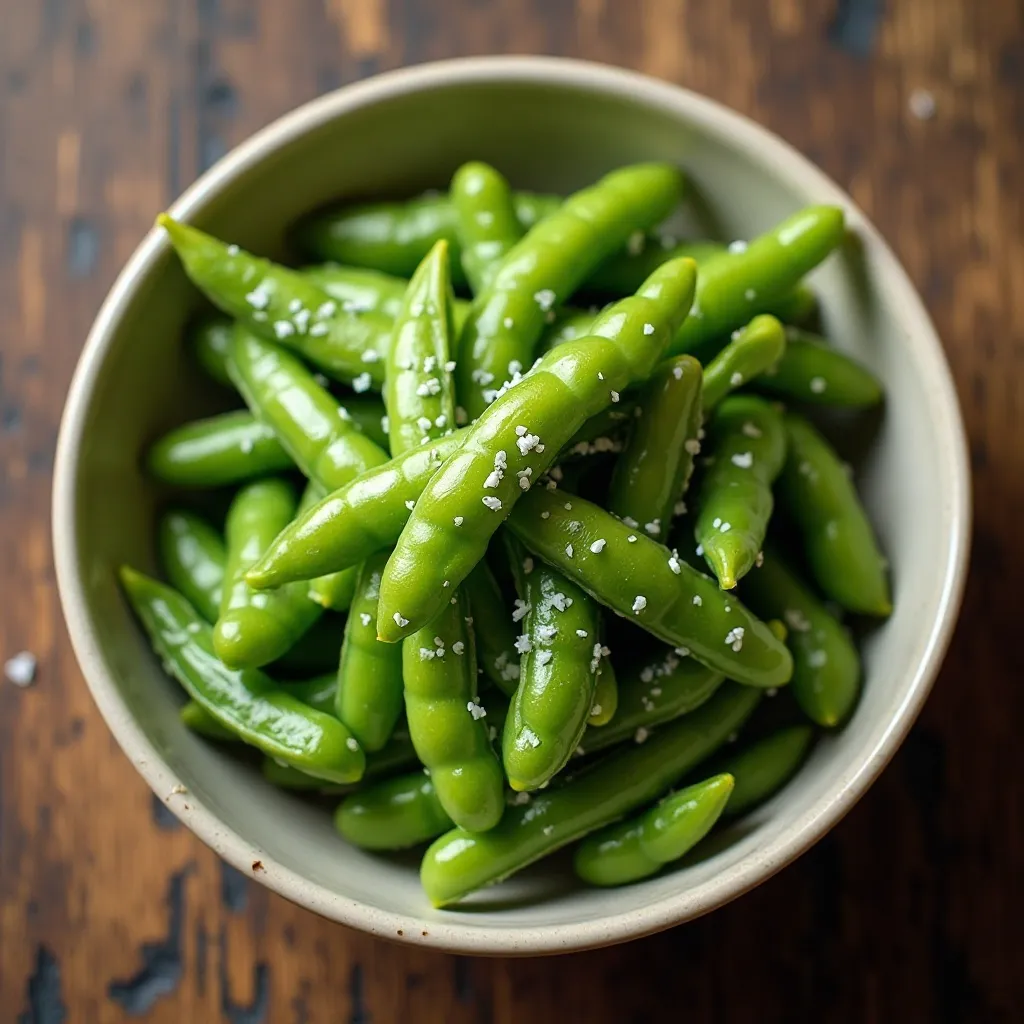
What Makes This Snack Special
Edamame is a powerhouse snack that’s surprisingly addictive. These young soybeans are loaded with plant-based protein and have a satisfying pop when you bite into them.
Key Ingredients for Edamame
- 1 lb frozen edamame in pods
- 2 tablespoons coarse sea salt
- 1 tablespoon sesame oil (optional)
- 1 teaspoon sesame seeds (optional)
- Red pepper flakes (optional)
Step-by-Step Instructions
Bring a large pot of water to a rolling boil.
Add one tablespoon of salt to the boiling water.
Add the frozen edamame pods and cook for 5-6 minutes until tender but still firm.
Drain the edamame in a colander and shake off excess water.
While still hot, transfer the edamame to a serving bowl.
Drizzle with sesame oil if using and toss to coat.
Sprinkle generously with coarse sea salt.
Add sesame seeds and red pepper flakes if desired for extra flavor.
Serve warm or at room temperature.
Storing Tips
Store cooked edamame in an airtight container in the refrigerator for up to 3 days. Reheat briefly in the microwave or enjoy cold.
11. Whole Grain Crackers with Cheese
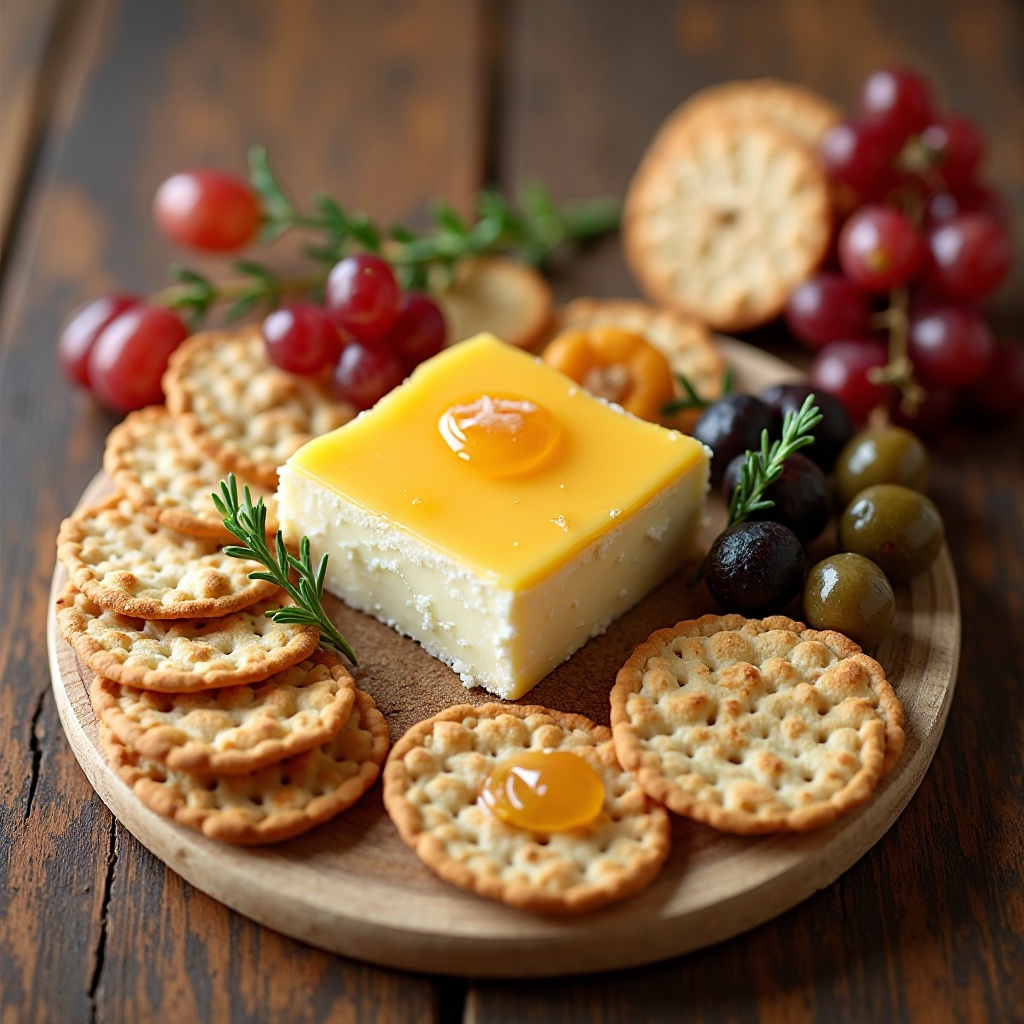
What Makes This Snack Special
This timeless combination is comfort food at its finest. The crispy crackers and creamy cheese create a perfect balance that satisfies both savory cravings and hunger.
Key Ingredients for Crackers and Cheese
- 12-15 whole grain crackers
- 2 oz aged cheddar cheese, sliced
- 2 oz goat cheese or brie
- Handful of grapes or apple slices
- 10-12 mixed olives
- Fresh thyme or rosemary sprigs
- Honey for drizzling
Step-by-Step Instructions
Arrange your crackers on a serving board or plate, creating small stacks or spreading them out decoratively.
Slice the aged cheddar into thin pieces that will fit nicely on the crackers.
If using soft cheese like brie, cut it into small wedges or leave it whole for spreading.
Crumble or slice the goat cheese and arrange it on the board.
Add fresh grapes or apple slices around the cheese for a touch of sweetness and color.
Scatter the olives around the board for a briny contrast.
Tuck fresh herb sprigs between the cheese and crackers for a beautiful presentation.
Drizzle a small amount of honey over the soft cheese or serve it on the side.
Serve with a cheese knife or small spreader.
Serving Tip
Let cheese sit at room temperature for 20 minutes before serving for the best flavor and texture.
12. Vegetable Spring Rolls with Peanut Sauce
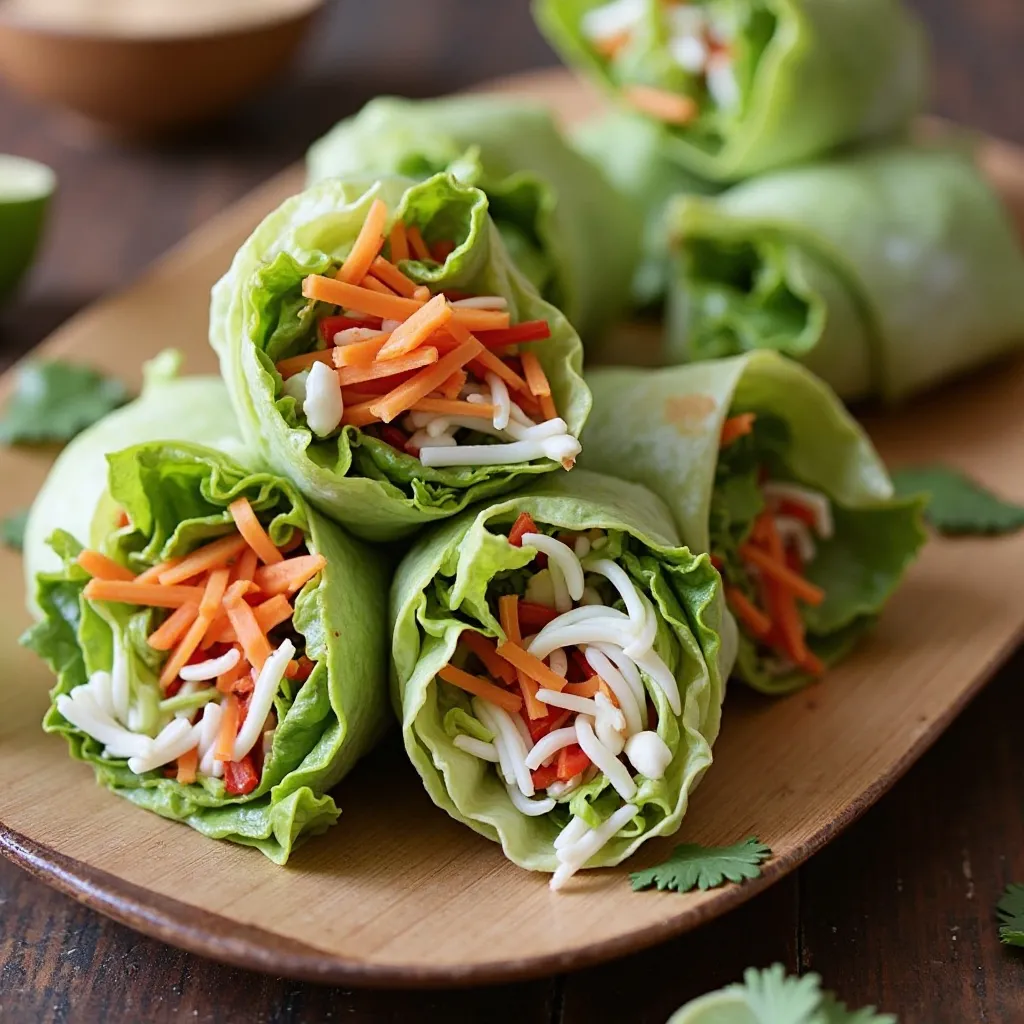
What Makes This Snack Special
These fresh spring rolls are light, colorful, and packed with crispy vegetables. The creamy peanut sauce takes them to the next level, making them feel like a special treat.
Key Ingredients for Spring Rolls
For the rolls:
- 8 rice paper wrappers
- 1 cup shredded lettuce
- 1 carrot, julienned
- 1 cucumber, julienned
- 1 red bell pepper, thinly sliced
- Fresh mint and cilantro leaves
- Rice vermicelli noodles, cooked and cooled
For the peanut sauce:
- ¼ cup natural peanut butter
- 2 tablespoons soy sauce
- 1 tablespoon lime juice
- 1 tablespoon honey
- 1 teaspoon sesame oil
- 2-3 tablespoons warm water
- 1 clove garlic, minced
Step-by-Step Instructions
Prepare the peanut sauce first:
Whisk together peanut butter, soy sauce, lime juice, honey, sesame oil, and garlic in a bowl.
Add warm water gradually until you reach a smooth, pourable consistency.
Set aside to let the flavors meld while you prepare the rolls.
Make the spring rolls:
Fill a shallow dish with warm water.
Dip one rice paper wrapper into the water for about 5-10 seconds until it becomes pliable but not too soft.
Lay the wrapper on a clean, damp kitchen towel or plate.
Place a small amount of lettuce in the center of the wrapper, leaving about 2 inches of space on each side.
Layer on the julienned vegetables, fresh herbs, and a small amount of noodles.
Fold the bottom of the wrapper up over the filling.
Fold in both sides tightly.
Roll up firmly from the bottom, keeping the roll tight as you go.
Place seam-side down on a plate and cover with a damp towel while you make the remaining rolls.
Slice each roll in half diagonally for easier eating and a prettier presentation.
Serve immediately with the peanut sauce for dipping.
Storing Tips
These are best enjoyed fresh, but you can prepare them up to 4 hours ahead. Keep them covered with a damp towel and plastic wrap in the refrigerator.
13. Baked Sweet Potato Rounds
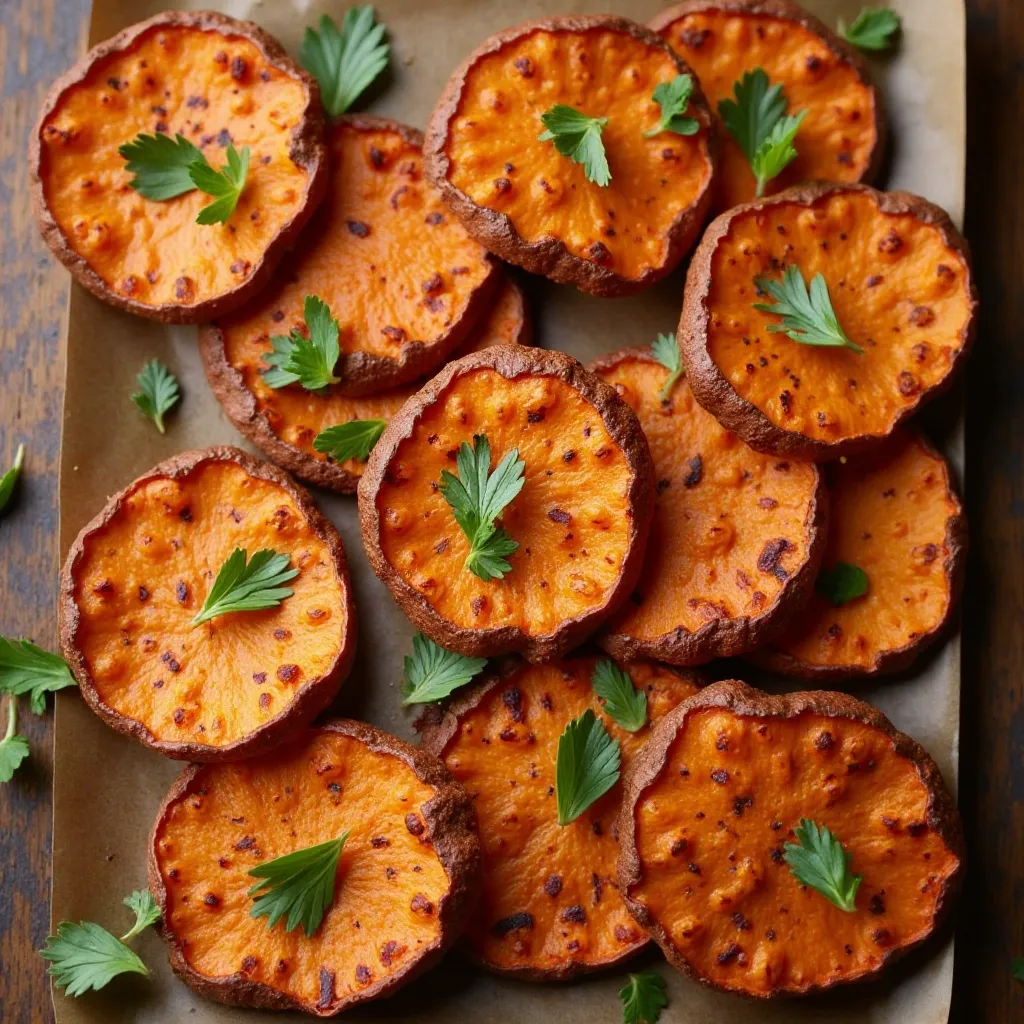
What Makes This Snack Special
These naturally sweet rounds are like healthy chips but so much better. They’re crispy on the outside, tender on the inside, and packed with vitamins and fiber.
Key Ingredients for Sweet Potato Rounds
- 2 medium sweet potatoes
- 2 tablespoons olive oil
- 1 teaspoon smoked paprika
- ½ teaspoon garlic powder
- ½ teaspoon onion powder
- Salt and pepper to taste
- Fresh parsley for garnish
- Greek yogurt or sour cream for dipping (optional)
Step-by-Step Instructions
Preheat your oven to 425°F for crispy edges.
Scrub the sweet potatoes clean but leave the skin on for extra nutrients and texture.
Slice the sweet potatoes into rounds about ¼ inch thick. Try to keep them uniform so they cook evenly.
Place the rounds in a large bowl and toss with olive oil until each piece is lightly coated.
In a small bowl, mix together the paprika, garlic powder, onion powder, salt, and pepper.
Sprinkle the spice mixture over the sweet potato rounds and toss to coat evenly.
Line a baking sheet with parchment paper and arrange the rounds in a single layer without overlapping.
Bake for 15 minutes, then flip each round carefully with a spatula.
Bake for another 10-15 minutes until the edges are crispy and slightly caramelized.
Remove from the oven and let cool for 5 minutes. They’ll continue to crisp up as they cool.
Garnish with fresh parsley and serve with Greek yogurt or sour cream for dipping.
Storing Tips
Store leftovers in an airtight container in the refrigerator for up to 3 days. Reheat in a 400°F oven for 5-7 minutes to restore crispiness.
14. Chia Seed Pudding
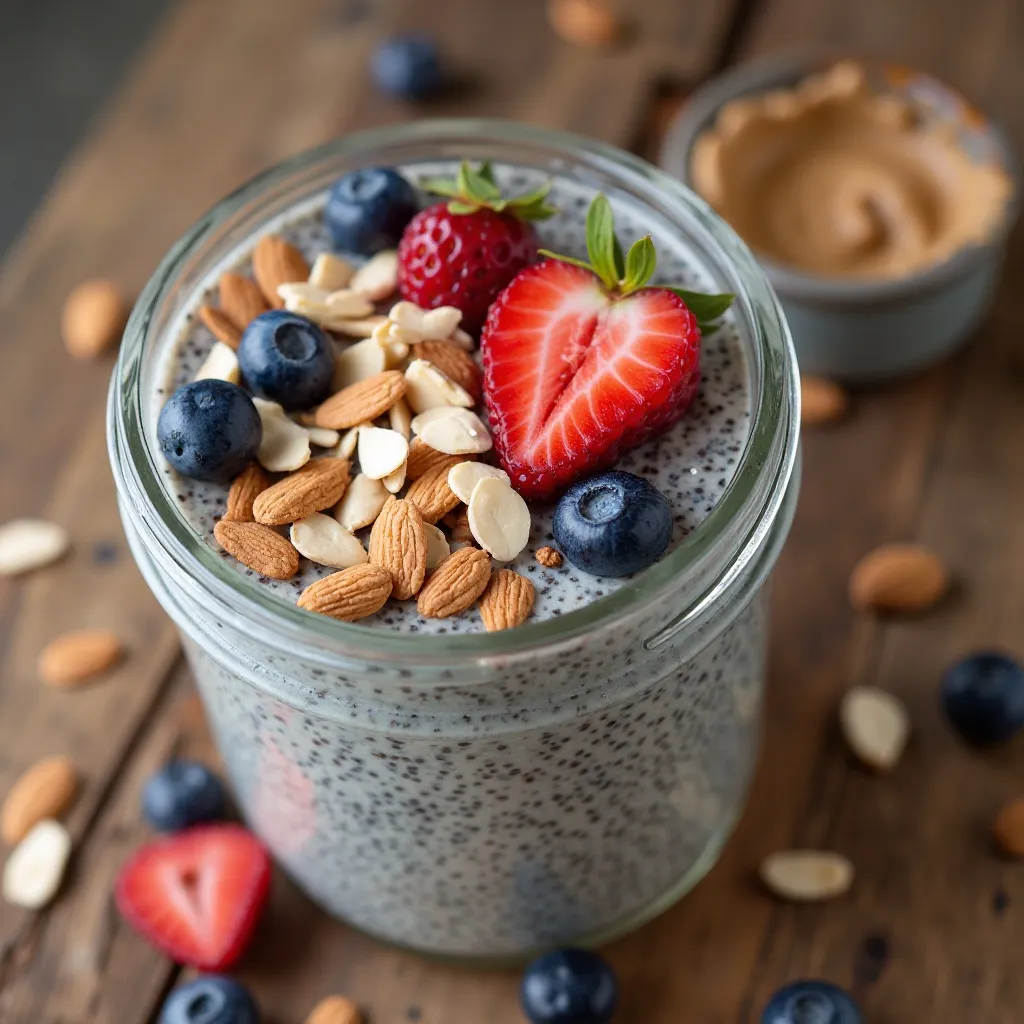
What Makes This Snack Special
This make-ahead snack feels like dessert but is incredibly nutritious. Chia seeds absorb liquid and create a creamy, pudding-like texture that’s rich in omega-3 fatty acids and fiber.
Key Ingredients for Chia Pudding
- ¼ cup chia seeds
- 1 cup unsweetened almond milk
- 1 tablespoon maple syrup or honey
- ½ teaspoon vanilla extract
- Pinch of cinnamon
- Fresh berries for topping
- Sliced almonds or coconut flakes
- A drizzle of nut butter (optional)
Step-by-Step Instructions
In a mason jar or bowl, combine chia seeds and almond milk.
Add maple syrup, vanilla extract, and cinnamon.
Whisk or shake vigorously for about 30 seconds to prevent clumping. This is important!
Let sit for 5 minutes, then whisk or shake again to break up any clumps that may have formed.
Cover and refrigerate for at least 4 hours or overnight. The mixture will thicken and become pudding-like.
In the morning or before serving, stir the pudding well.
If it’s too thick, add a splash of almond milk and stir to reach your desired consistency.
Top with fresh berries, sliced almonds, coconut flakes, or a drizzle of nut butter.
Serve cold straight from the refrigerator.
Flavor Variations
Try chocolate chia pudding by adding 1 tablespoon cocoa powder, or matcha chia pudding with ½ teaspoon matcha powder.
Storing Tips
Store in covered containers in the refrigerator for up to 5 days. Add toppings fresh when ready to eat.
15. Stuffed Dates with Nut Butter
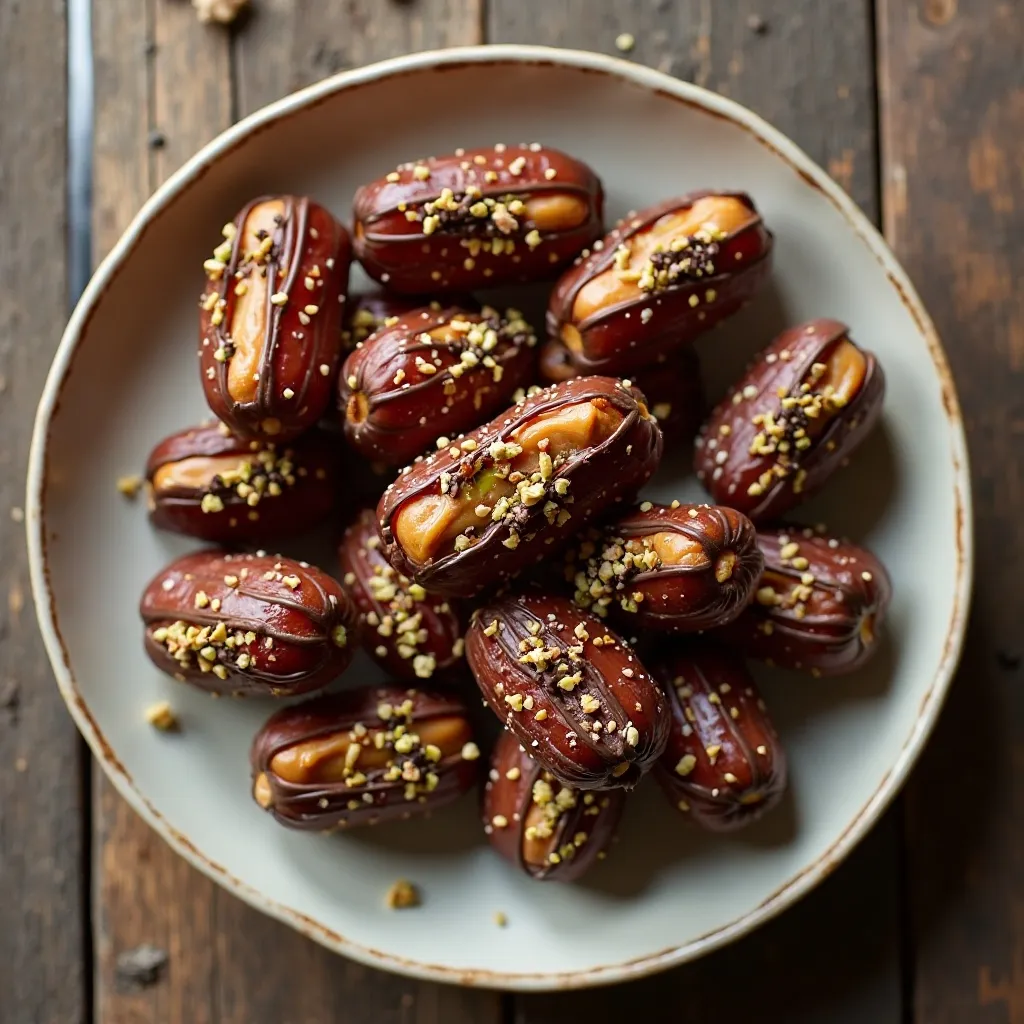
What Makes This Snack Special
These little gems are nature’s candy elevated. The chewy sweetness of dates combined with creamy nut butter creates an indulgent treat that’s actually good for you.
Key Ingredients for Stuffed Dates
- 12 Medjool dates
- ¼ cup almond butter or peanut butter
- 2 tablespoons chopped pistachios
- Pinch of sea salt
- Optional: dark chocolate for drizzling
- Optional: coconut flakes
Step-by-Step Instructions
Pit the dates by making a lengthwise slit down one side with a small knife.
Gently open each date and remove the pit, being careful not to tear the date completely in half.
Using a small spoon or piping bag, fill each date cavity with about ½ teaspoon of nut butter.
Press the date back together gently around the filling.
Sprinkle the top with chopped pistachios and a tiny pinch of sea salt.
If using chocolate, melt it in the microwave in 15-second intervals and drizzle over the stuffed dates.
Sprinkle with coconut flakes if desired while the chocolate is still wet.
Let the chocolate set at room temperature or pop them in the refrigerator for 10 minutes.
Serve immediately or store for later.
Storing Tips
Store in an airtight container in the refrigerator for up to 1 week. They’re also delicious straight from the fridge!
What to Serve These Snacks With
Beverages That Pair Perfectly:
Green tea or herbal tea complements most of these snacks beautifully, especially the sweet options like energy balls and stuffed dates. For savory snacks like roasted chickpeas and spiced nuts, try sparkling water with a squeeze of lime. Fresh fruit smoothies work wonderfully alongside protein-rich options like Greek yogurt parfaits or hummus with vegetables.
Creating a Snack Board:
Combine several of these snacks on a large platter for entertaining. Arrange caprese skewers, crackers with cheese, roasted nuts, and fresh fruit for a vegetarian grazing board that will impress guests. Add some whole grain crackers and a bowl of hummus for variety.
Meal Prep Ideas:
Pack these snacks into portion-sized containers for the week. Pair energy balls with apple slices, or hummus containers with pre-cut veggies. This makes grabbing healthy snacks effortless during busy weekdays.
Top Tips for Perfecting Your Healthy Snacks
Master Your Timing
Many of these snacks taste best when certain components are at room temperature. Cheese should sit out for 20 minutes before serving, and nut butters spread more easily when slightly warm. Cold ingredients can mute flavors, so plan accordingly.
Batch Preparation Saves Time
Dedicate one hour on Sunday to prep multiple snacks for the week. Roast chickpeas and nuts together, prepare a big batch of hummus, chop vegetables, and make energy balls. Store everything properly and you’ll have healthy options ready all week.
Quality Ingredients Matter
Invest in good quality nuts, seeds, and nut butters without added oils or sugars. Fresh herbs and spices make a huge difference in flavor. When possible, choose organic produce for items you’ll eat with the skin on.
Don’t Skip the Seasoning
Many healthy snacks become bland when under-seasoned. Don’t be shy with herbs, spices, salt, and acid like lemon juice. These elements transform simple ingredients into craveable snacks.
Texture Is Everything
Pay attention to combining different textures in your snacks. Crunchy with creamy, chewy with crispy – these contrasts make snacks more satisfying and interesting.
Watch Your Portions
Even healthy snacks contain calories. Nuts and nut butters are especially calorie-dense. Pre-portion snacks into containers or bags to avoid mindless overeating.
Experiment with Flavors
Don’t be afraid to customize these recipes to your taste preferences. Try different spice combinations on roasted chickpeas, swap almond butter for cashew butter, or add your favorite fruits to parfaits.
Storing and Reheating Tips
Room Temperature Storage:
Roasted chickpeas, spiced nuts, and energy balls can be stored at room temperature in airtight containers. Keep them in a cool, dry place away from direct sunlight. Most will stay fresh for 5-7 days.
Refrigeration Guidelines:
Hummus, cream cheese-based snacks, and anything with fresh dairy should be refrigerated immediately. Greek yogurt parfaits last 24 hours when stored properly. Fresh spring rolls keep for 4 hours when covered with a damp towel and plastic wrap.
Freezing for Convenience:
Energy balls freeze beautifully for up to 3 months. Roasted sweet potato rounds can be frozen and reheated. Baked items like savory muffins (if you make them) freeze well individually wrapped.
Reheating Methods:
For crispy snacks that have lost their crunch, spread them on a baking sheet and heat in a 350°F oven for 5-7 minutes. Roasted chickpeas and sweet potato rounds benefit from this treatment. Avoid microwaving these items as it makes them soggy.
Preventing Sogginess:
Store wet and dry components separately when possible. Keep granola separate from yogurt parfaits until serving time. Store crackers away from cheese and dips.
Freshness Indicators:
Discard any snacks that develop off odors, mold, or unusual textures. Nuts that taste bitter have gone rancid and should be thrown away. Vegetables that become slimy aren’t safe to eat.
Common Mistakes to Avoid
Mistake 1: Not Drying Ingredients Properly
Moisture is the enemy of crispy snacks. When making roasted chickpeas or nuts, dry them thoroughly before adding oil and seasoning. Wet vegetables will make dips watery and dilute flavors.
Mistake 2: Overcrowding the Baking Sheet
Give your food space! Overcrowded baking sheets create steam instead of allowing proper roasting and crisping. Use two baking sheets if necessary.
Mistake 3: Using Cold Ingredients
Cold cream cheese won’t blend smoothly. Cold nut butters are difficult to spread. Cold cheese has less flavor. Remember to bring temperature-sensitive ingredients to room temperature when appropriate.
Mistake 4: Skipping the Taste Test
Always taste your snacks before storing or serving. You might need more salt, acid, or spice to make them truly delicious. Adjust seasonings while you can.
Mistake 5: Making Everything Too Sweet
Just because a snack is healthy doesn’t mean it needs extra sweetener. Many fruits and vegetables have natural sweetness. Start with less sweetener and add more only if needed.
Mistake 6: Not Considering Texture Changes
Some snacks change texture over time. Crispy items soften, soft items dry out. Plan accordingly and store properly to maintain the best texture.
Mistake 7: Forgetting About Food Safety
Don’t leave dairy-based snacks at room temperature for more than 2 hours. Always store cut vegetables properly to prevent bacterial growth.
Frequently Asked Questions
Can I meal prep these snacks for the entire week?
Absolutely! Most of these snacks are perfect for meal prep. Roasted chickpeas, spiced nuts, and energy balls stay fresh all week when stored properly. Make a big batch on Sunday and portion them into individual containers. For snacks with fresh components like caprese skewers or cucumber rounds, prep the ingredients separately and assemble daily for the best quality.
Are these snacks actually filling or will I be hungry soon after?
These snacks are specifically designed to keep you satisfied because they combine protein, fiber, and healthy fats. Chickpeas, nuts, Greek yogurt, and nut butters provide protein that keeps hunger at bay. The fiber from vegetables, whole grains, and seeds helps you feel full longer. Choose snacks with a good balance of all three macronutrients for maximum satiety.
How can I make these snacks kid-friendly?
Kids love most of these snacks with minor tweaks! Energy balls are always a hit – let them help roll them. Apple slices with almond butter are popular when you add a sprinkle of mini chocolate chips. Make the roasted chickpeas less spicy and let kids choose their favorite seasonings. Veggie sticks with hummus work better when you include their favorite vegetables and let them dip themselves.
What if I have nut allergies?
Many of these snacks are naturally nut-free or easily adaptable. Roasted chickpeas, hummus with vegetables, caprese skewers, edamame, and Greek yogurt parfaits (with nut-free granola) are all safe options. For recipes calling for nut butters, substitute sunflower seed butter or tahini. For recipes with nuts as garnish, use roasted seeds like pumpkin or sunflower seeds instead.
How long do homemade snacks really last compared to store-bought?
Homemade snacks typically last 5-7 days when stored properly, which is plenty of time for weekly meal prep. While store-bought snacks may have longer shelf lives due to preservatives, homemade versions are fresher and healthier. The key is proper storage – airtight containers, proper refrigeration when needed, and separating wet from dry components.
Can I make these snacks vegan?
Most of these snacks are already vegan or easily adapted! Replace Greek yogurt with coconut or almond milk yogurt. Use vegan cream cheese for cucumber rounds. Substitute maple syrup for honey in all recipes. Skip the cheese in crackers and cheese, or use cashew cheese instead. The majority of these recipes require minimal or no modifications for a vegan diet.
Are these snacks suitable for weight loss?
Yes, when consumed in appropriate portions! These snacks are nutrient-dense rather than calorie-dense, meaning they provide lots of nutrition relative to their calories. They help control hunger between meals, preventing overeating at meal times. The key is portion control – pre-portion your snacks and be mindful of calorie-dense items like nuts and nut butters.
What’s the most budget-friendly option?
Roasted chickpeas are incredibly economical – a can costs less than $2 and makes several servings. Hummus made from scratch costs a fraction of store-bought versions. Energy balls use pantry staples that you probably already have. Buying vegetables in season and making your own snacks instead of purchasing pre-packaged options will save significant money over time.
How do I keep vegetables fresh for snacking all week?
Store cut vegetables in airtight containers with a slightly damp paper towel. Keep them in the crisper drawer of your refrigerator. Don’t cut vegetables until you’re ready to use them within 3-4 days. Store different vegetables separately as some release gases that can affect others. Refresh vegetables by soaking them briefly in ice water if they start to lose crispness.
Can these snacks help with specific dietary goals like increasing protein?
Definitely! Greek yogurt parfaits provide 15-20 grams of protein per serving. Roasted chickpeas offer plant-based protein and fiber. Edamame is an excellent protein source with all essential amino acids. Combine hummus with whole grain crackers for complete protein. Choose snacks based on your specific nutritional goals – protein, fiber, healthy fats, or specific vitamins and minerals.
Nutrition Information (Per Serving Estimates)
| Snack | Calories | Protein | Carbs | Fat | Fiber |
|---|---|---|---|---|---|
| Roasted Chickpeas (½ cup) | 140 | 6g | 22g | 3g | 6g |
| Hummus with Veggies | 180 | 7g | 18g | 9g | 6g |
| Greek Yogurt Parfait | 220 | 15g | 28g | 6g | 4g |
| Avocado Toast | 250 | 8g | 28g | 14g | 9g |
| Energy Balls (2 balls) | 160 | 5g | 20g | 8g | 3g |
| Caprese Skewers (4 skewers) | 120 | 8g | 4g | 8g | 1g |
| Spiced Roasted Nuts (¼ cup) | 180 | 6g | 8g | 15g | 3g |
| Cucumber Rounds (8 pieces) | 95 | 3g | 6g | 7g | 1g |
| Apple with Almond Butter | 200 | 5g | 27g | 10g | 5g |
| Edamame (1 cup pods) | 120 | 11g | 10g | 5g | 4g |
| Crackers with Cheese | 190 | 9g | 16g | 11g | 2g |
| Spring Rolls (2 rolls) | 180 | 4g | 28g | 6g | 3g |
| Sweet Potato Rounds | 145 | 2g | 24g | 5g | 4g |
| Chia Pudding | 165 | 5g | 22g | 7g | 10g |
| Stuffed Dates (3 dates) | 195 | 4g | 32g | 7g | 4g |
Note: Nutritional values are estimates and vary based on specific ingredients and portion sizes used.
Final Thoughts
The journey to healthier snacking doesn’t have to be boring or complicated. These 15 vegetarian snacks prove that nutritious food can be absolutely delicious and satisfying. I’ve learned through years of experimenting that the secret isn’t deprivation – it’s finding flavorful, wholesome options that make you excited to snack.
Start by trying just two or three of these recipes this week. Maybe roast a batch of chickpeas on Sunday and prep some energy balls. Once you see how easy and tasty they are, you’ll naturally want to expand your healthy snack repertoire.
Remember, healthy eating is about progress, not perfection. Some days you’ll nail your snack prep, and other days you might grab something less nutritious. That’s completely okay! What matters is developing sustainable habits over time.
Which snack are you most excited to try first? I’d love to hear about your favorites and any creative variations you come up with. Drop a comment below and let’s inspire each other on this delicious journey to healthier snacking!
Happy snacking, friends! 🌱