Healthy Sourdough Discard Pizza – Step by Step Guide
There’s something magical about transforming leftover sourdough discard into golden, crispy pizza crust. This healthy sourdough discard pizza combines the tangy depth of fermented dough with wholesome ingredients to create a meal that’s both nutritious and incredibly satisfying.
I discovered this recipe during my sourdough journey when I couldn’t bear tossing another cup of discard down the drain. The best part? It’s ready in under two hours, costs pennies to make, and my kids devour it faster than takeout. If you loved my sourdough banana bread, you’ll absolutely adore this savory twist on using that precious discard.
What is Healthy Sourdough Discard Pizza?
Ever wondered why we’re suddenly obsessed with putting “discard” in pizza? It sounds strange, right? Here’s the beautiful truth: healthy sourdough discard pizza is your gateway to guilt-free pizza nights while reducing kitchen waste.
That tangy starter you’d normally throw away becomes the star ingredient in a naturally fermented crust that’s easier to digest and packed with beneficial bacteria. As they say, the way to a family’s heart is through creative cooking, and this recipe proves it. Don’t let another feeding cycle go to waste—grab that jar and let’s make magic happen!
Why You’ll Love This Healthy Sourdough Discard Pizza
Zero Waste, Maximum Flavor
The biggest win here is transforming something you’d discard into restaurant-quality pizza. My sourdough starter gets fed weekly, which means I accumulate discard quickly. Instead of feeling guilty about waste, I now get excited because pizza night is calling! The fermented tang adds incredible depth that store-bought dough simply can’t match.
Budget-Friendly Homemade Goodness
Ordering pizza regularly drains your wallet fast. Making healthy sourdough discard pizza at home costs less than three dollars per pizza, compared to fifteen or more for delivery. You’re already maintaining your starter, so why not maximize its potential? The ingredients are pantry staples, and you can customize toppings based on what’s in your fridge.
Nutritional Benefits You’ll Actually Notice
Unlike traditional pizza made with commercial yeast, this version undergoes natural fermentation that breaks down gluten and increases nutrient availability. The extended fermentation creates a lower glycemic option that won’t spike your blood sugar as dramatically. Plus, you control the toppings, meaning you can load up on vegetables, use quality cheese, and skip the processed meats. If you enjoyed my sourdough crackers recipe, you’ll appreciate how versatile and health-conscious sourdough discard recipes can be.
Customization Heaven
From classic Margherita to adventurous Mediterranean combinations, this base accommodates any flavor profile. Make it vegan, load it with proteins, or keep it simple with olive oil and herbs—the choice is yours.
How to Make Healthy Sourdough Discard Pizza
Quick Overview
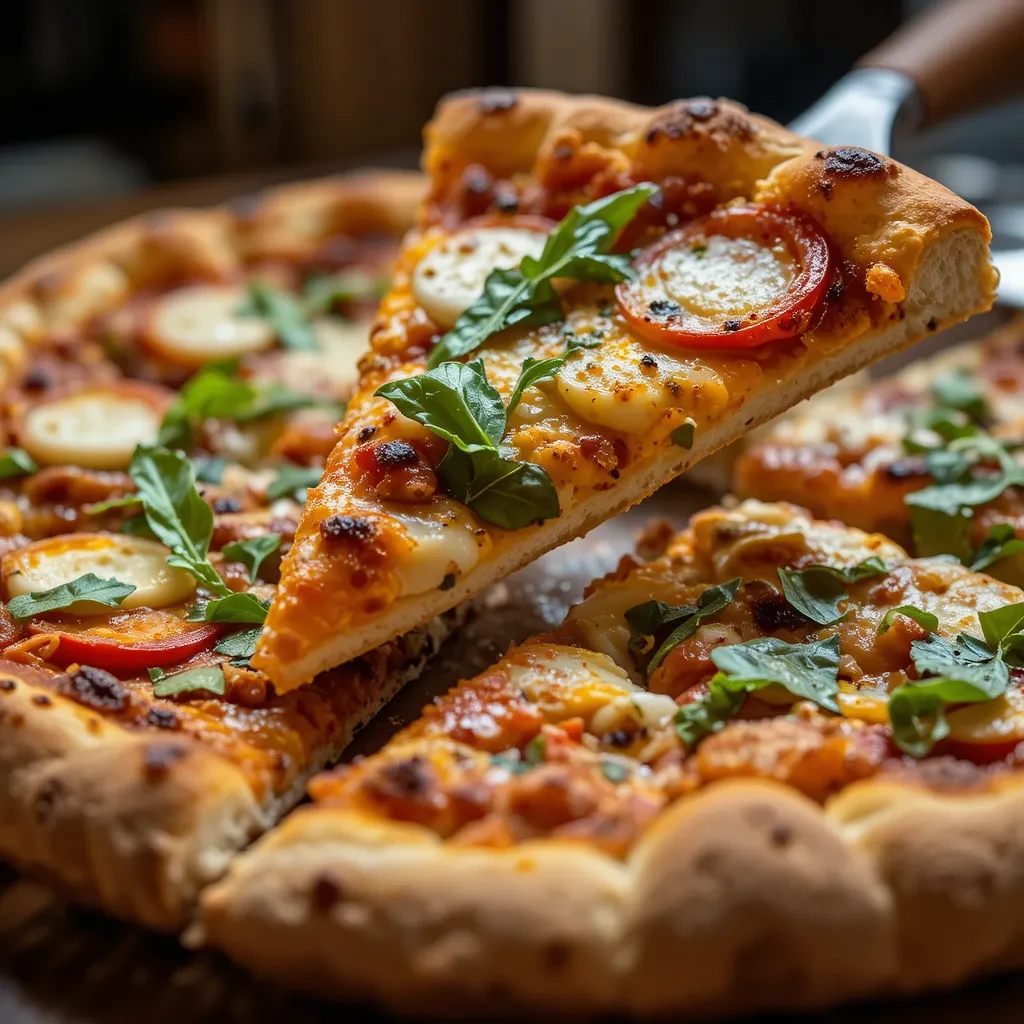
This healthy sourdough discard pizza strikes the perfect balance between simplicity and impressive results. The crust develops a beautiful crispy exterior with a tender, slightly chewy interior that showcases the characteristic sourdough tang. What makes this recipe special is its flexibility—you can prepare the dough in the morning for evening pizza or let it develop overnight for even more complex flavors.
Preparation breakdown:
- Active prep time: 15 minutes
- Resting time: 1-4 hours (or overnight)
- Baking time: 12-15 minutes
- Total time: 1.5 hours minimum to 24 hours maximum
Key Ingredients for Healthy Sourdough Discard Pizza
For the Dough:
- 1 cup (240g) sourdough discard (unfed, straight from the fridge works perfectly)
- 2 cups (250g) all-purpose flour or bread flour (bread flour creates chewier crust)
- 3/4 cup (180ml) warm water (adjust based on discard consistency)
- 2 tablespoons olive oil (plus extra for drizzling)
- 1 teaspoon salt
- 1 teaspoon honey or maple syrup (feeds the fermentation)
- 1/2 teaspoon baking powder (optional, for extra lift)
For Healthy Toppings:
- 1 cup tomato sauce or pesto (homemade or quality store-bought)
- 1.5 cups shredded mozzarella cheese (or dairy-free alternative)
- Fresh vegetables (bell peppers, mushrooms, spinach, cherry tomatoes, red onions)
- Fresh herbs (basil, oregano, thyme)
- Optional proteins (grilled chicken, turkey pepperoni, chickpeas)
- Finishing touches (red pepper flakes, parmesan, arugula)

Step-by-Step Instructions
Step 1: Prepare the Dough Base
In a large mixing bowl, combine your sourdough discard with warm water and honey. Whisk these together until the discard fully dissolves into the water. The mixture should look milky and slightly bubbly. This step activates the wild yeasts still present in your discard, giving them a little boost before incorporating the flour.
Step 2: Add Dry Ingredients
Add the flour and salt to your wet mixture. Using a wooden spoon or your hands, mix until a shaggy dough forms. Don’t worry if it looks messy—this is exactly right. The dough will seem sticky at first, which is normal. Let it rest for five minutes to allow the flour to hydrate fully.
Step 3: Knead and Develop Gluten
Drizzle the olive oil over your dough and begin kneading. You can do this in the bowl or on a lightly floured surface. Knead for about five to eight minutes until the dough becomes smooth and elastic. You’ll notice it transforms from sticky to soft and pliable. If the dough remains excessively sticky, add flour one tablespoon at a time. Trust your hands—the dough should feel like a soft earlobe.
Step 4: First Rise
Shape your dough into a ball and place it in a lightly oiled bowl, turning once to coat all sides. Cover with a damp kitchen towel or plastic wrap. Let it rest at room temperature for one to four hours. The dough won’t double in size like traditional yeasted dough—expect about fifty percent increase. For deeper flavor, refrigerate overnight and bring to room temperature before using.
Step 5: Preheat and Prepare
Thirty minutes before baking, position your oven rack in the lowest position and preheat to 475°F (245°C). If you have a pizza stone or steel, place it in the oven now to heat thoroughly. If using a baking sheet, flip it upside down and heat it too. This creates a makeshift pizza stone that promotes crispy bottom crusts.
Step 6: Shape Your Pizza
Divide the dough in half for two medium pizzas or keep whole for one large pizza. On a piece of parchment paper, gently stretch and press the dough into your desired shape. Start from the center and work outward, leaving a slightly thicker edge for the crust. Don’t use a rolling pin—hand-stretching creates better texture. If the dough resists, let it rest for five minutes and try again.
Step 7: Par-Bake the Crust (Optional but Recommended)
For extra crispiness, brush the shaped dough lightly with olive oil and bake for five minutes before adding toppings. This sets the bottom and prevents sogginess. Remove from the oven and proceed with topping.
Step 8: Add Your Toppings
Spread a thin layer of sauce, leaving a half-inch border around the edges. Less is more with pizza sauce—too much creates soggy pizza. Sprinkle cheese evenly, then add your chosen vegetables and proteins. Don’t overload the pizza or it won’t cook evenly. Drizzle a little olive oil over everything and season with salt, pepper, and dried herbs.
Step 9: Bake to Perfection
Carefully transfer your pizza (still on parchment) to the preheated stone or baking sheet. Bake for twelve to fifteen minutes, until the crust is golden brown and the cheese is bubbly with charred spots. Watch carefully during the last few minutes—the difference between perfect and burnt happens quickly.
Step 10: Rest and Serve
Remove the pizza from the oven and let it rest for three minutes before slicing. This allows the cheese to set slightly, making cleaner cuts. Add fresh basil, arugula, or a drizzle of balsamic glaze for restaurant-worthy presentation.
What to Serve Healthy Sourdough Discard Pizza With
Pizza is a complete meal, but thoughtful sides elevate the experience. I love serving this with a simple arugula salad dressed with lemon, olive oil, and shaved parmesan—the peppery greens cut through the richness beautifully.
Roasted vegetables make excellent companions too. Try balsamic-glazed Brussels sprouts or garlic roasted broccoli. The caramelized edges complement the pizza’s charred crust wonderfully.
For drinks, sparkling water with fresh lemon or lime keeps things light. Homemade iced tea or fruit-infused water also works perfectly. If serving at a gathering, consider offering a variety of sparkling beverages with fresh herbs like mint or rosemary.
Don’t forget about appetizers! Serve with homemade hummus and vegetable sticks, or marinated olives and cheese cubes for a Mediterranean-inspired feast.
Top Tips for Perfecting Healthy Sourdough Discard Pizza
Use Room Temperature Discard for Faster Rise
While cold discard works, bringing it to room temperature speeds up fermentation. Take it out of the fridge thirty minutes before mixing your dough.
Adjust Hydration Based on Your Discard
Every sourdough starter has different hydration levels. If your discard is thick, add more water. If it’s runny, reduce water by a few tablespoons. The final dough should be soft but not sticky.
Don’t Skip the Resting Time
Even if you’re in a hurry, give the dough at least one hour to rest. This develops flavor and makes the dough easier to stretch. Patience pays off in texture and taste.
Preheat Your Baking Surface Thoroughly
A scorching hot oven and baking surface create that coveted crispy bottom. Don’t rush this step—thirty minutes of preheating ensures success.
Practice Hand-Stretching Technique
Rolling pins compress the dough too much, creating dense crust. Gentle hand-stretching preserves air bubbles and creates better texture. It takes practice, but each pizza will improve.
Experiment with Flour Combinations
Swap twenty-five percent of all-purpose flour with whole wheat or spelt for added nutrition and nuttiness. Just note that whole grain flours absorb more liquid, so adjust accordingly.
Storing and Reheating Tips
Storing Unbaked Dough:
Wrap shaped or unshaped dough tightly in plastic wrap and refrigerate for up to three days. The flavor actually improves with time as fermentation continues slowly. You can also freeze dough balls for up to three months—just thaw overnight in the refrigeridge before using.
Storing Baked Pizza:
Leftover pizza keeps in an airtight container in the refrigerator for up to four days. Place parchment paper between slices to prevent sticking. Avoid leaving pizza at room temperature for more than two hours.
Reheating Methods:
The best way to reheat pizza is in a skillet over medium heat. Place the slice in a dry pan, cover with a lid, and heat for three to four minutes. This crisps the bottom while melting the cheese perfectly.
Alternatively, reheat in a 375°F oven for eight to ten minutes. Place pizza directly on the oven rack for maximum crispiness.
Avoid microwaving if possible—it creates rubbery texture. If you must microwave, place a cup of water alongside the pizza to add moisture and prevent excessive drying.
Common Baking Mistakes and How to Avoid Them
Soggy Bottom Crust
This happens when the oven isn’t hot enough or you’ve used too much sauce. Always preheat thoroughly and apply sauce sparingly. Par-baking the crust also helps tremendously.
Dough That Won’t Stretch
If your dough keeps snapping back, it needs more rest time. Cover it and wait ten minutes—gluten needs time to relax. Working cold dough is also difficult, so ensure it’s room temperature.
Dense, Heavy Texture
This usually indicates over-kneading or adding too much flour. The dough should be soft and slightly tacky, not stiff. Trust the process even if it feels too wet initially.
Pale, Undercooked Crust
Your oven temperature is likely too low or the baking time too short. Invest in an oven thermometer—many ovens run cooler than displayed. Don’t be afraid of dark golden color; that’s where the flavor lives.
Toppings Sliding Off
This happens when you overload the pizza or don’t leave a clean edge. Keep the border clear and distribute toppings evenly. Less is genuinely more with pizza.
Frequently Asked Questions
Can I use active sourdough starter instead of discard?
Yes, absolutely! Active starter works wonderfully, though it will ferment faster than discard. You might need to reduce rising time by thirty minutes to an hour. The flavor will be slightly more pronounced and tangy.
Do I need to add commercial yeast to this recipe?
No, this recipe relies entirely on the wild yeasts in your sourdough discard. However, if you’re short on time, you can add half a teaspoon of instant yeast to speed up rising. This creates a hybrid that still offers sourdough flavor with faster results.
Why didn’t my dough rise much?
Sourdough discard is less active than fed starter, so it won’t rise as dramatically as commercial yeast dough. Expect about fifty percent increase rather than doubling. Also, if your kitchen is cold, fermentation slows significantly—try placing the dough near a warm oven or in a sunny spot.
Can I make this dough gluten-free?
Traditional sourdough requires gluten to develop structure, but you can experiment with gluten-free sourdough starters and gluten-free flour blends. The texture will differ significantly, and you’ll likely need to add xanthan gum for binding. This is advanced territory that requires specific gluten-free knowledge.
How do I know when my pizza is done?
Look for golden-brown crust with darker charred spots, bubbly cheese with caramelized edges, and crispy bottom that lifts easily from the pan. The crust should sound hollow when tapped on the bottom.
Can I freeze sourdough discard pizza dough?
Yes! Shape dough into balls, wrap tightly in plastic wrap, then place in a freezer bag. Freeze for up to three months. Thaw overnight in the refrigerator, then bring to room temperature before stretching and baking.
My discard is several weeks old—is it still safe to use?
If stored properly in the fridge and showing no signs of mold or off odors, older discard is perfectly safe. It may have a stronger, more sour flavor, which many people prefer. Just give it a good stir and check for any discoloration.
What’s the best flour for pizza crust?
Bread flour creates the chewiest, most authentic texture due to higher protein content. All-purpose flour works well for thinner, crispier crusts. Type 00 flour produces professional-level results but isn’t necessary for home baking.
Nutrition Information
| Nutrient | Per Slice (1/8 of pizza) |
|---|---|
| Calories | 220 |
| Protein | 9g |
| Carbohydrates | 28g |
| Fiber | 2g |
| Fat | 8g |
| Saturated Fat | 3g |
| Sodium | 380mg |
| Sugar | 2g |
Nutritional values are approximate and vary based on specific ingredients and toppings used.
Final Thoughts
Making healthy sourdough discard pizza has completely changed how I view my weekly starter maintenance. What once felt like a chore now excites me because I know incredible meals are just a few hours away. The satisfaction of creating restaurant-quality pizza from scratch, using ingredients that would otherwise be wasted, never gets old.
This recipe proves that healthy eating doesn’t mean sacrificing flavor or fun. Each bite offers the complex tanginess of fermentation, the satisfaction of crispy-chewy texture, and the joy of knowing exactly what went into your food.
Start with this basic recipe, then make it your own. Try different flours, experiment with hydration levels, and discover your favorite topping combinations. Before long, you’ll be the friend everyone asks for pizza advice.
So grab that jar of discard from your fridge and preheat your oven. Your best homemade pizza awaits, and trust me—once you master this technique, delivery menus will gather dust. Happy baking!